September 13th, 2022
We are happy to announce our newest release of Pipeliner CRM.
This release includes another exciting batch of new features for our app as well as other improvements to existing functionality.
Please note that some of these features are only available for our Business, EnterpriseEnterprise Enterprise (in the context of sales) is a relatively large organization typically composed of multiple levels, locations, and departments which need multi-layer software systems that support collaboration across a large corporate environment., or Unlimited Tiers.
Brand New LeadLead Lead refers to a prospect or potential customer (who can be an individual or organization) that exhibits interest in your service or product; or any additional information about such entity. Actions
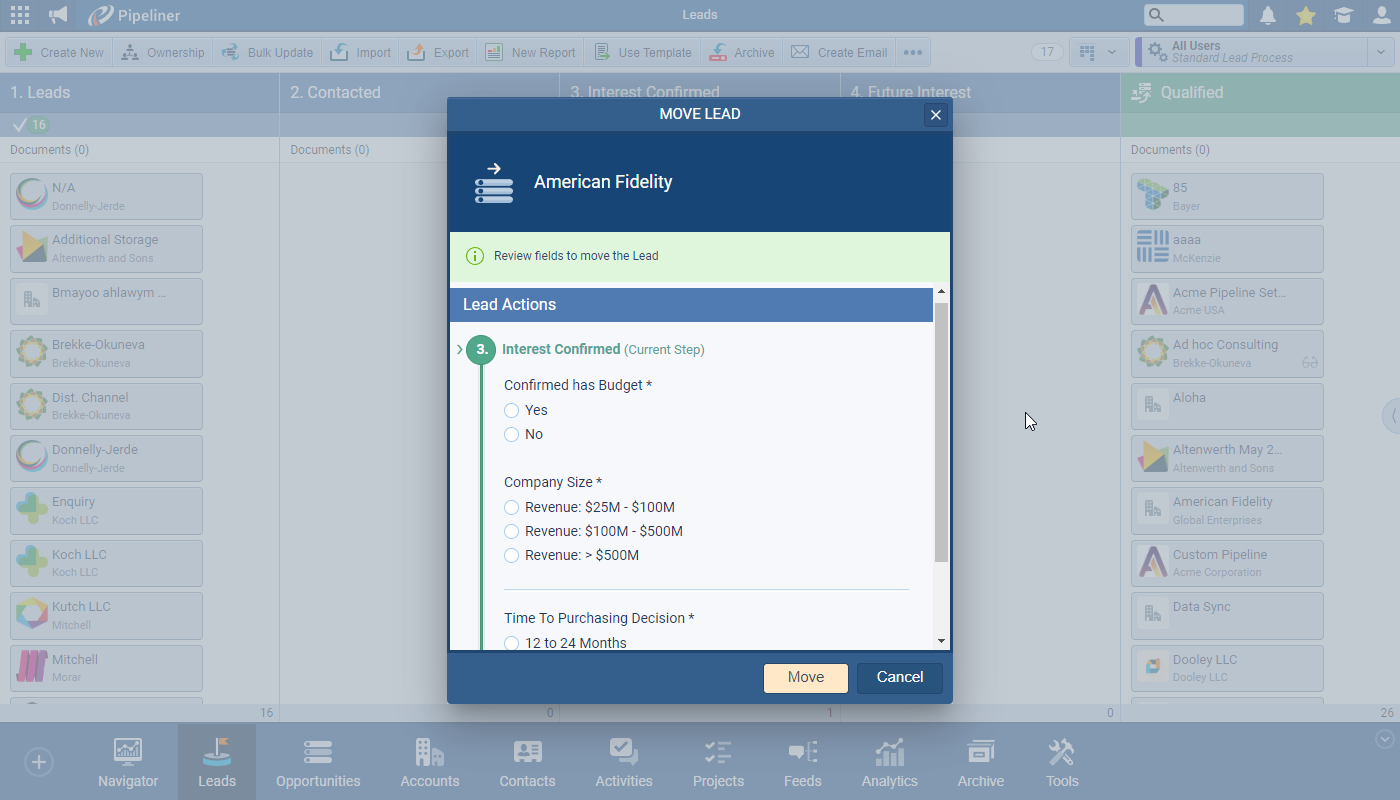
Lead Action fields allow Pipeliner Admins to ensure that the right questions have been asked and answered before your team can move “Leads” onwards through your Lead process towards “Qualification“. Pipeliner Admins can add fields to the relevant step in your Lead process, making them required so that a Lead cannot be moved into that step without the field being completed. This can help ensure that your Business Development team is capturing the right information at the right time so that when the Lead is “Qualified“, all the correct information is passed onwards to the Sales team. ⤵
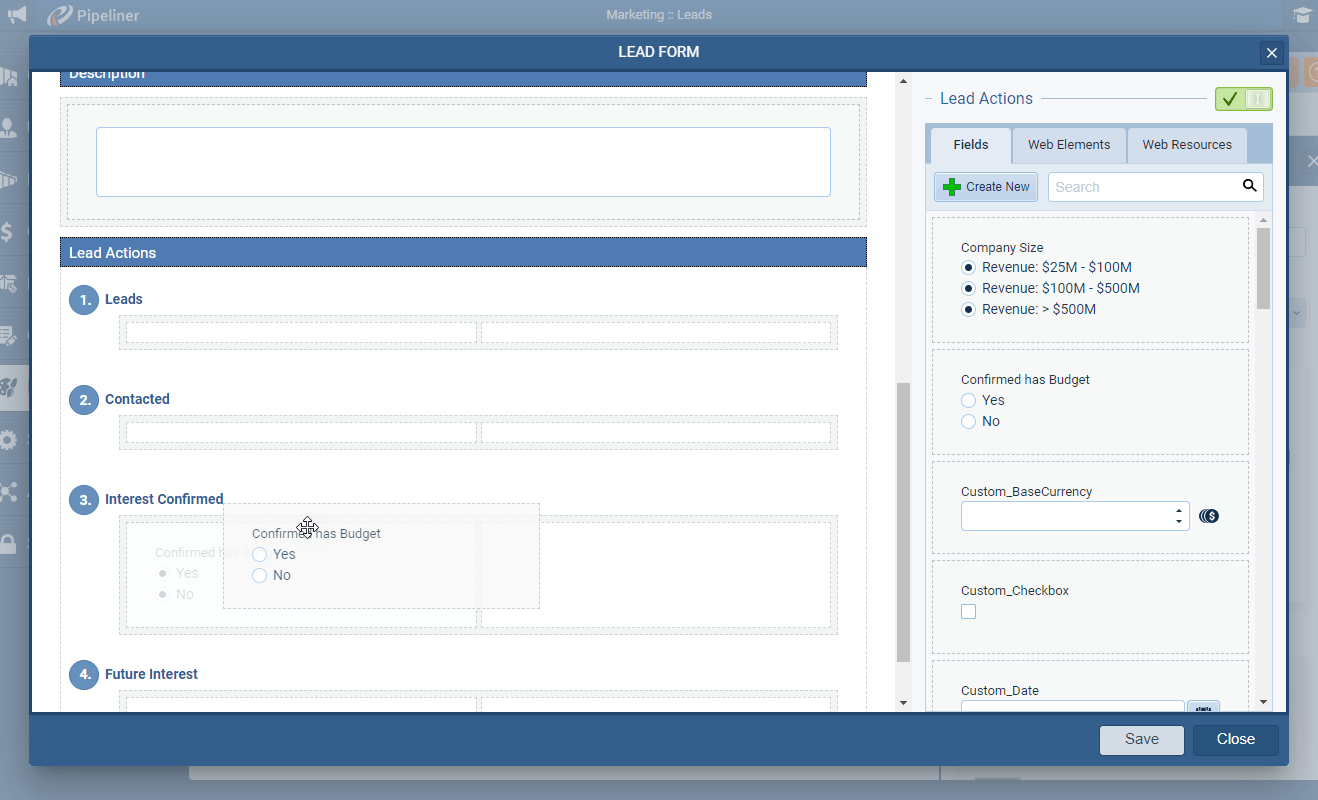
Once “Lead Action” fields have been enabled and added, the section that the fields are placed in on the Lead Form will only appear once the Lead reaches that step in the process. If those fields are not already completed, when the Lead is moved, a pop-up dialog box will appear which requires your users to complete those specific “Lead Action” fields that have not yet been filled in. The userUser User means a person who uses or consumes a product or a service, usually a digital device or an online service. will not be able to move that Lead to the next step until the required “Lead Action” fields are completed.
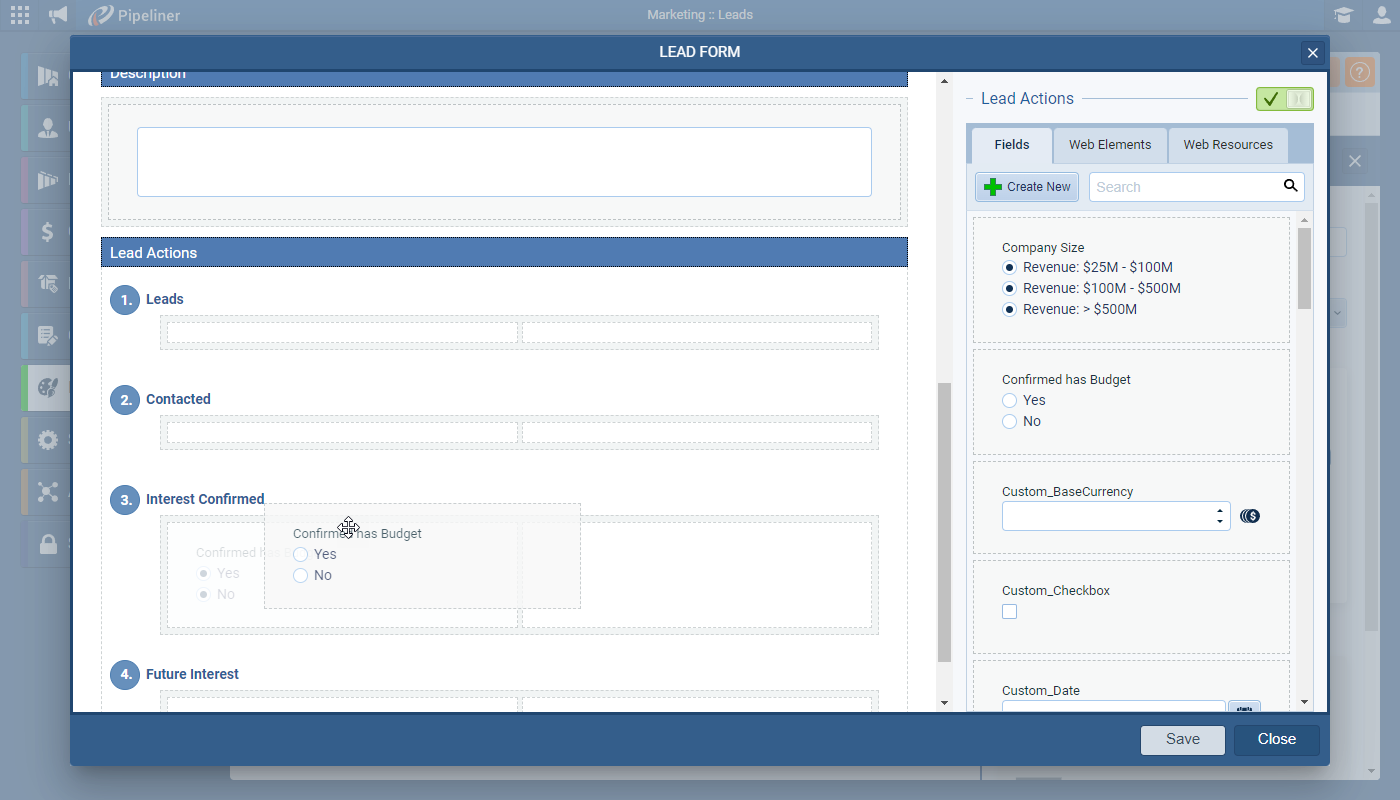
From the Admin Module, Admin users will choose the “Fields & Forms” menu, then the “Leads” menu, and the “Forms” tab. They will then choose the “Lead Type” they want to work with. Clicking on “Edit Form” will then allow them to enable the “Lead Actions” section and add fields to the relevant step. ⤵
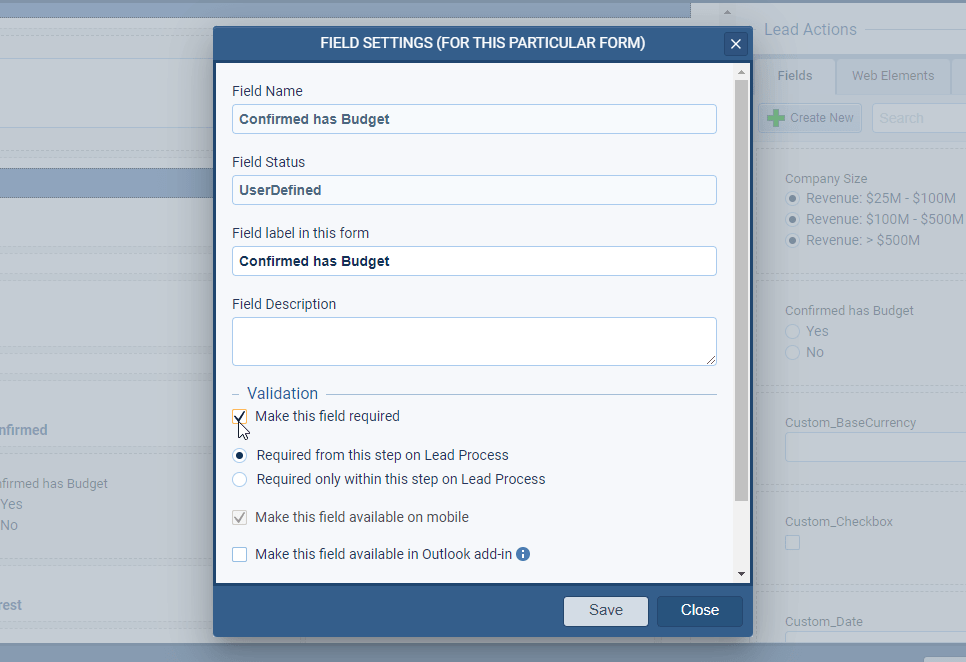
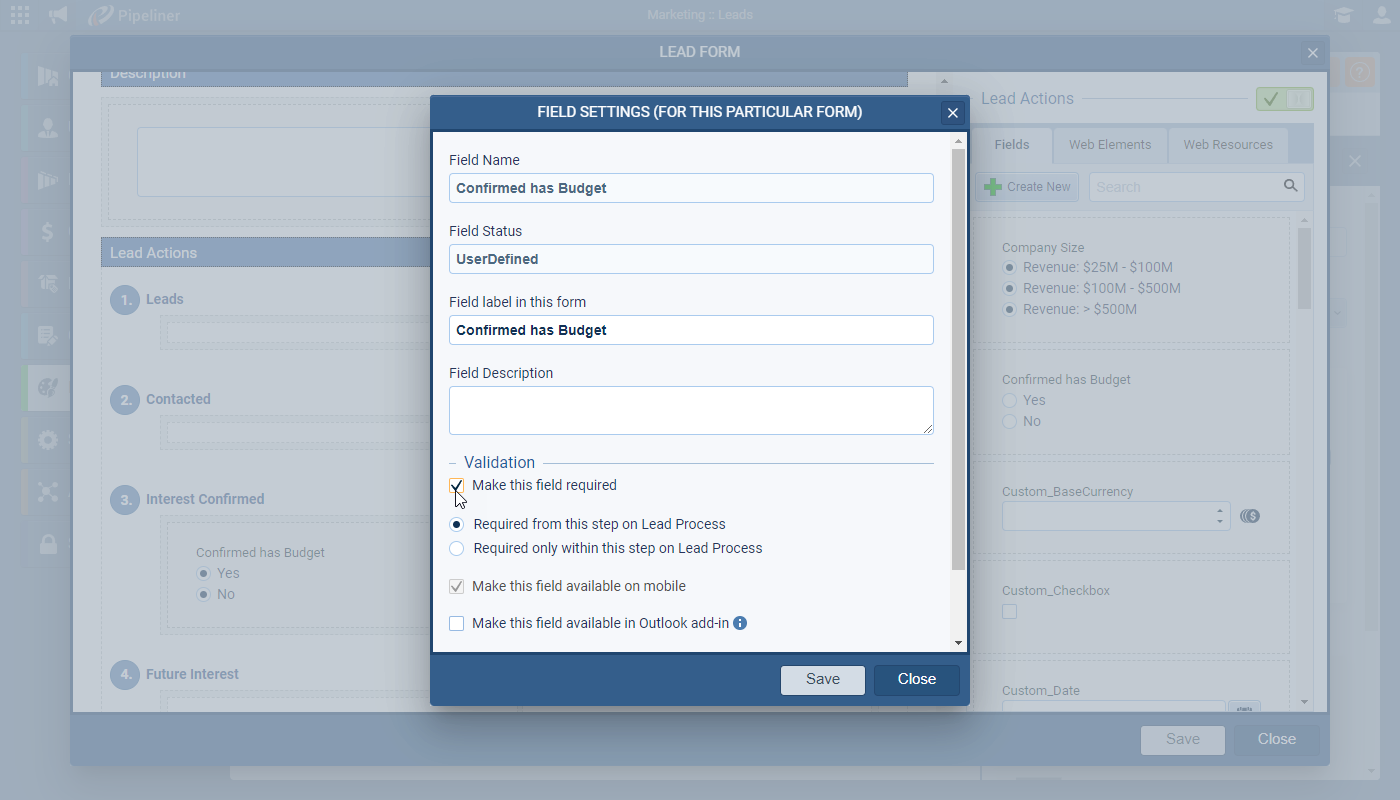
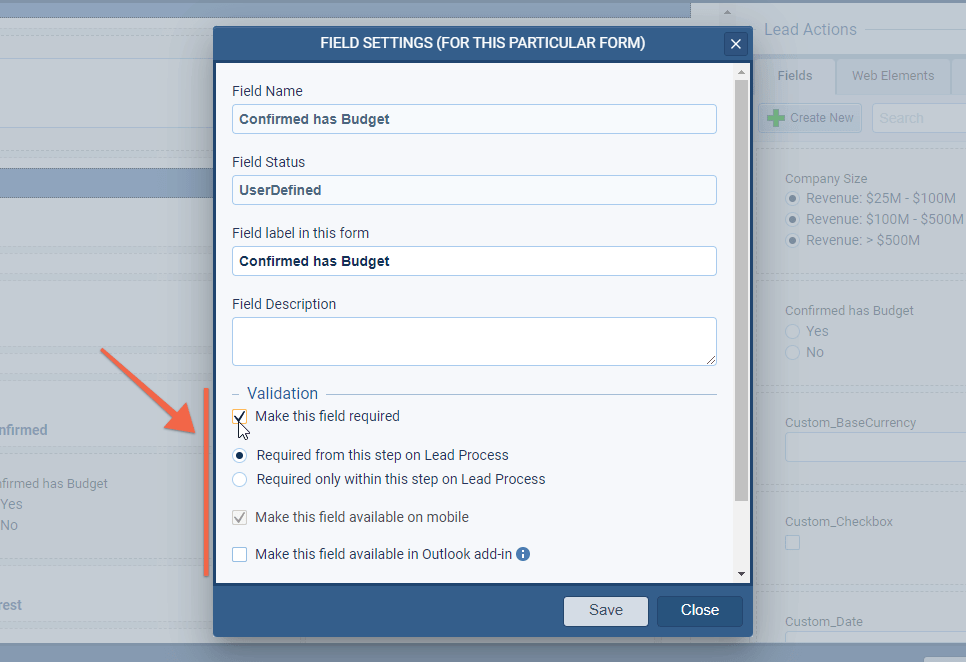
The “Field Form › Settings” can then be modified to set the field as required to include it in the pop-up dialogue box when a user moves a “Lead” into another step. ⤵
Check our Knowledge Base article to get more information about Lead Actions ›
Improved Forecasts
Using a hierarchy allows you to plan Forecasts to roll up from one type of record to another — for example, a number of “Users” to a “Sales Unit” or from certain “Accounts” to a “User” or from “Users” to “Products“. You can use up to 5 levels in a hierarchy — one level for each type of record — Users, Sales Units, Products, ProductProduct Product refers to anything (an idea, item, service, process or information) that meets a need or a desire and is offered to a market, usually but not always at a price. Categories or Accounts.
NOTE: The bottom level is the most important and is where the key values live — both Forecast values and for QuotaQuota Quota is a predefined benchmark indicating the amount of sales a selling unit such as a sales rep or a regional sales team should achieve within a given period, often used as a measure of success, performance and eligibility for commissions and other rewards. settings.
NOTE: You can opt for a flat structure – for example, selecting just Users or just Products.
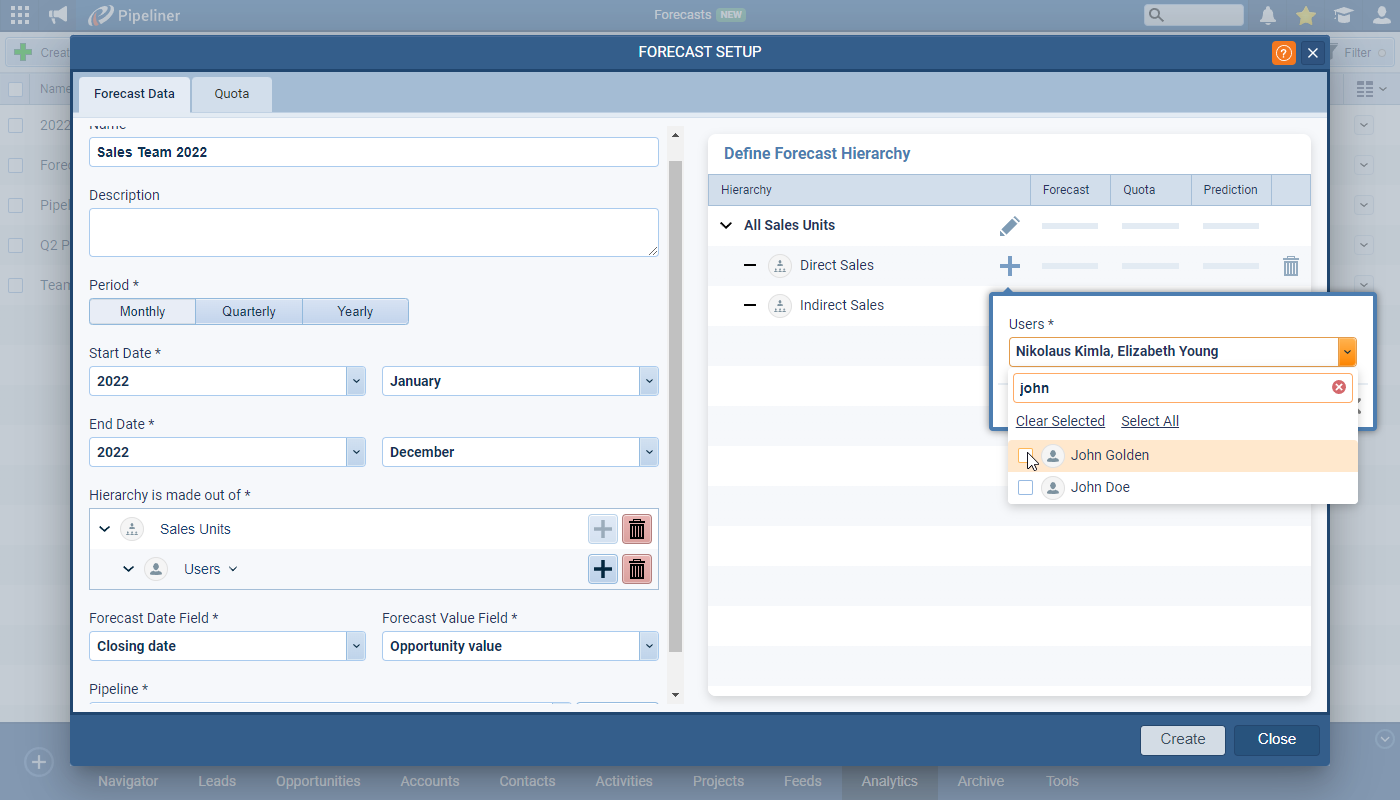
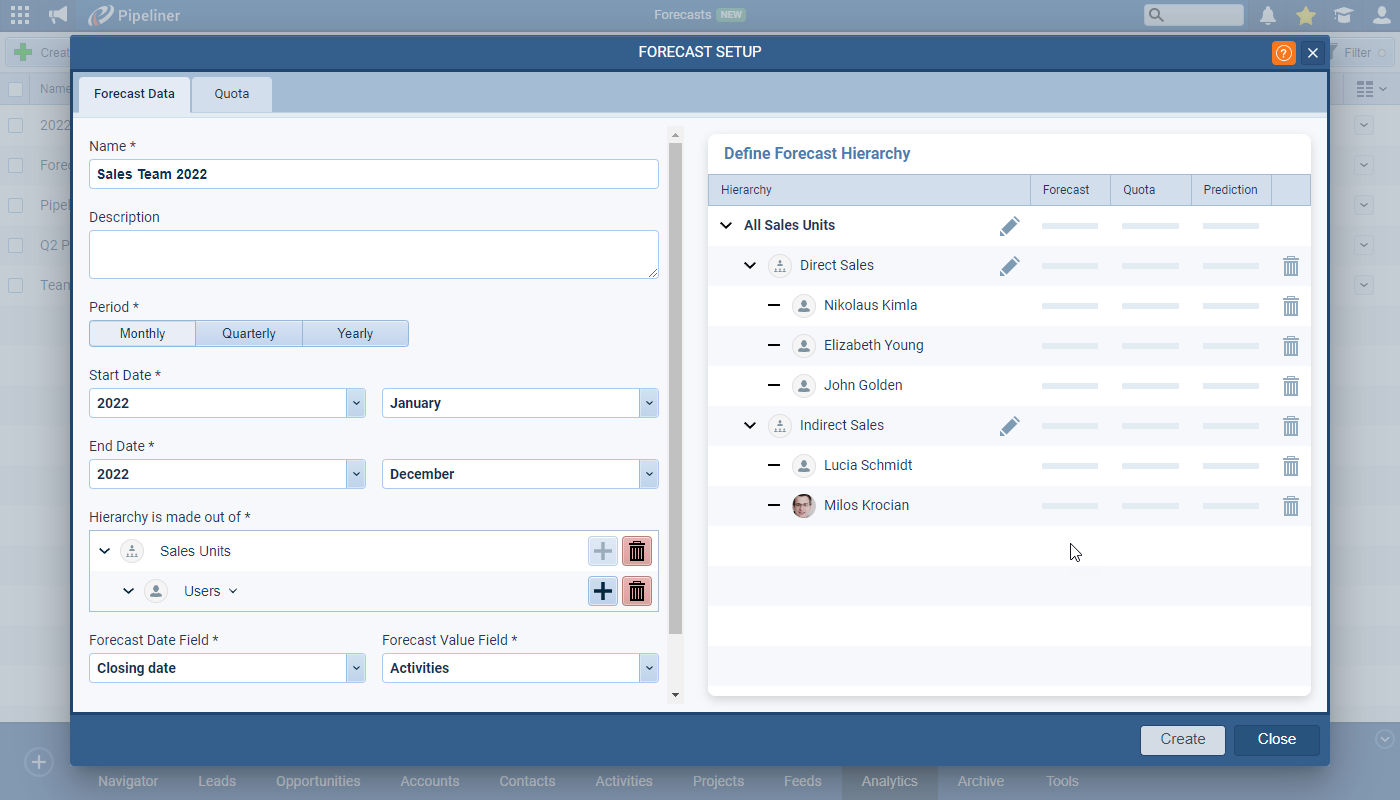
Choose your “Hierarchy” settings by selecting the top level and then add additional levels below. In the “Define Forecast Hierarchy” panel, you’ll then need to select which records to include in your “Forecast” — e.g. which “Sales Units” or which “Users“. ⤵
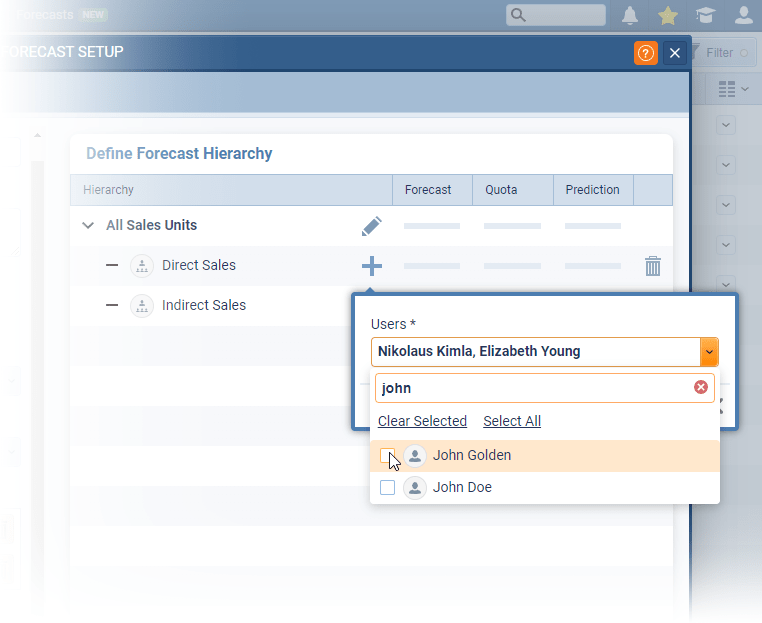
You won’t be able to save your Forecast until you have added to each level of your hierarchy.
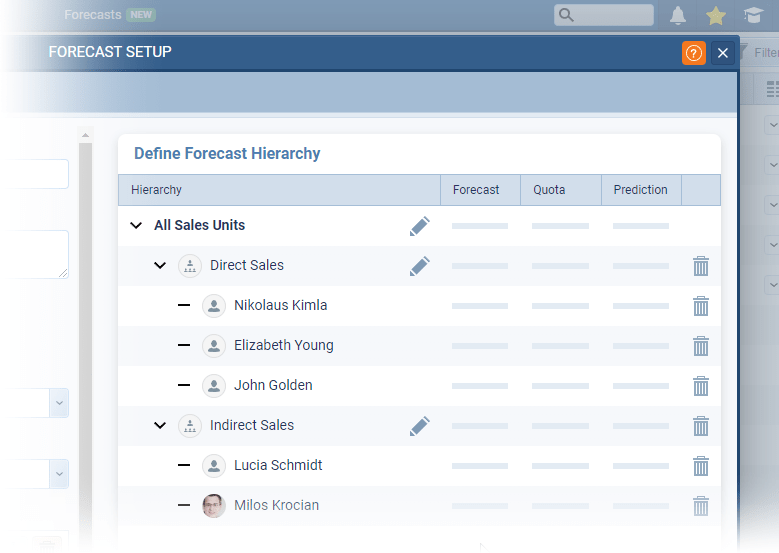
Your final hierarchy will look similar to this example. ⤵
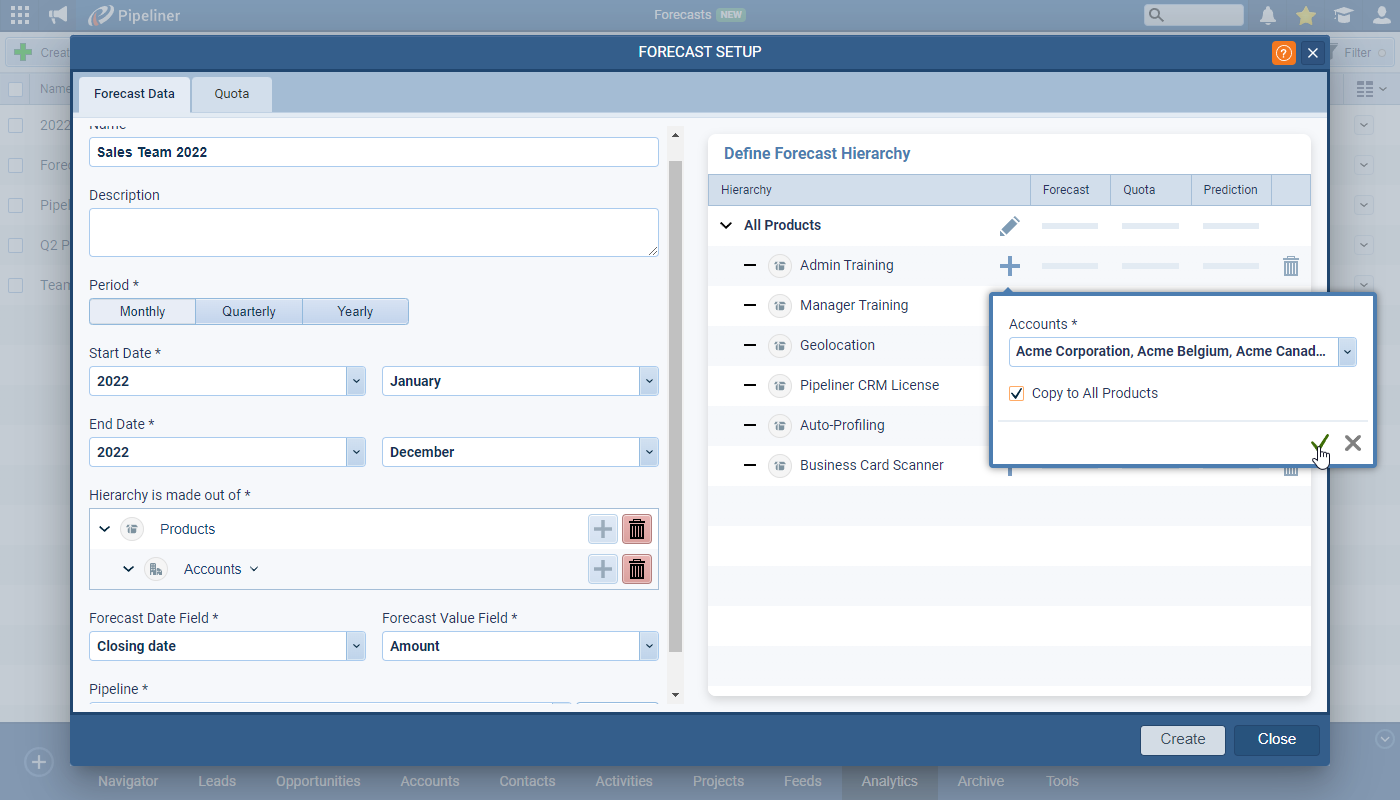
Here’s another example that you could use for “Key AccountAccount Account refers to a record of primary and background information about an individual or corporate customer, including contact data, preferred services, and transactions with your company. Planning“. This is a “Forecast of Products” by selected “Accounts“. Once you’ve selected the “Accounts” to use, you can copy them to all the “Products” you have chosen to include so you don’t have to keep re-selecting them in each branch of your Forecast. ⤵
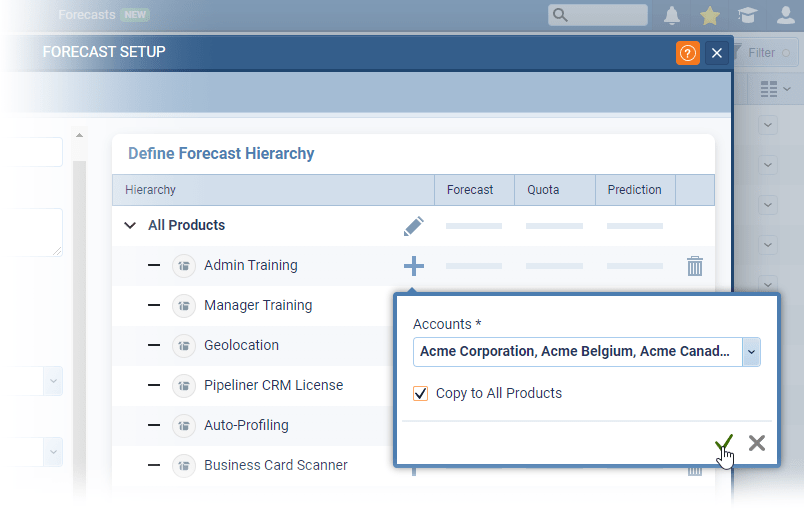
Once you’ve selected the Accounts to use, you can copy them to all the Products you have chosen to include so you don’t have to keep re-selecting them in each branch of your Forecast.
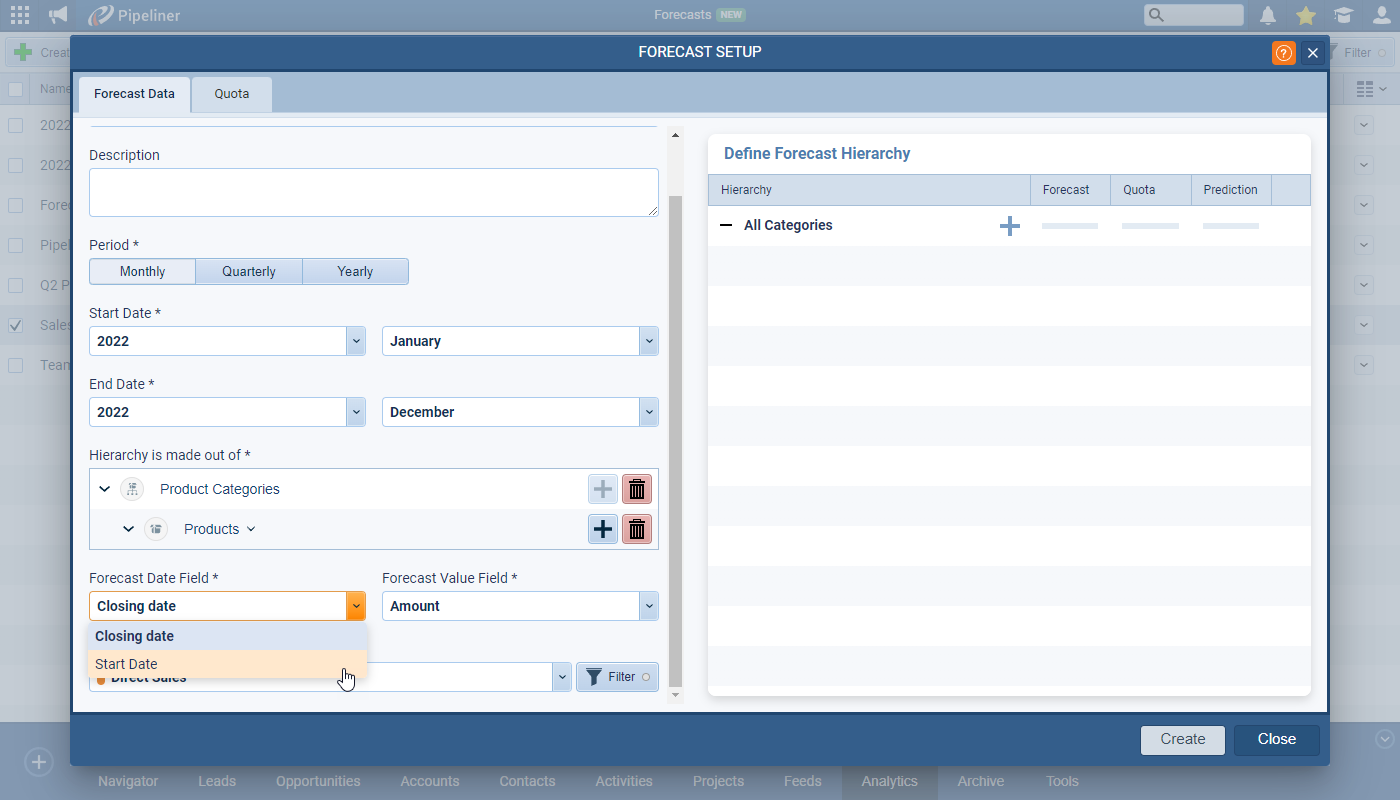
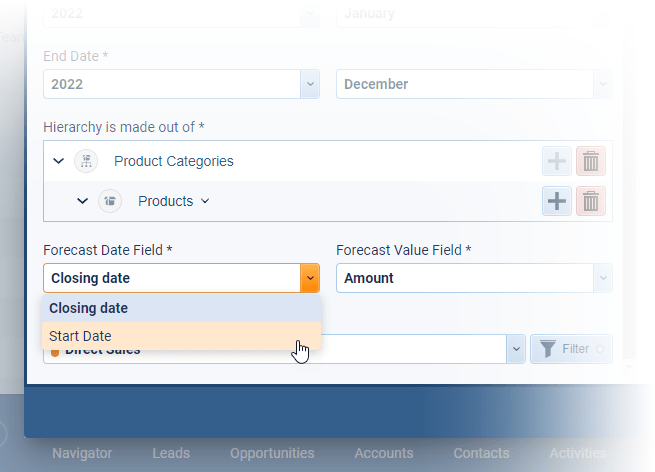
You can now also select the date you want to use for your Forecast date range from any system or custom date field. This could be “Closing Date” for Opportunities or any other custom date that you have created — perhaps a “Project Start Date” — or, if your Forecast is built on Products, this can be a custom “Product Line › Item Date” field that you have created. ⤵
Check our Knowledge Base article to get more information about Forecasts ›
Adding Field Highlighting to your Form Views
Users can apply coloured field highlighting to selected fields when working with multiple “Form Views” within the web app. “Form Views” can be created and shared by users working within Leads, Opportunities, Accounts and Contacts.
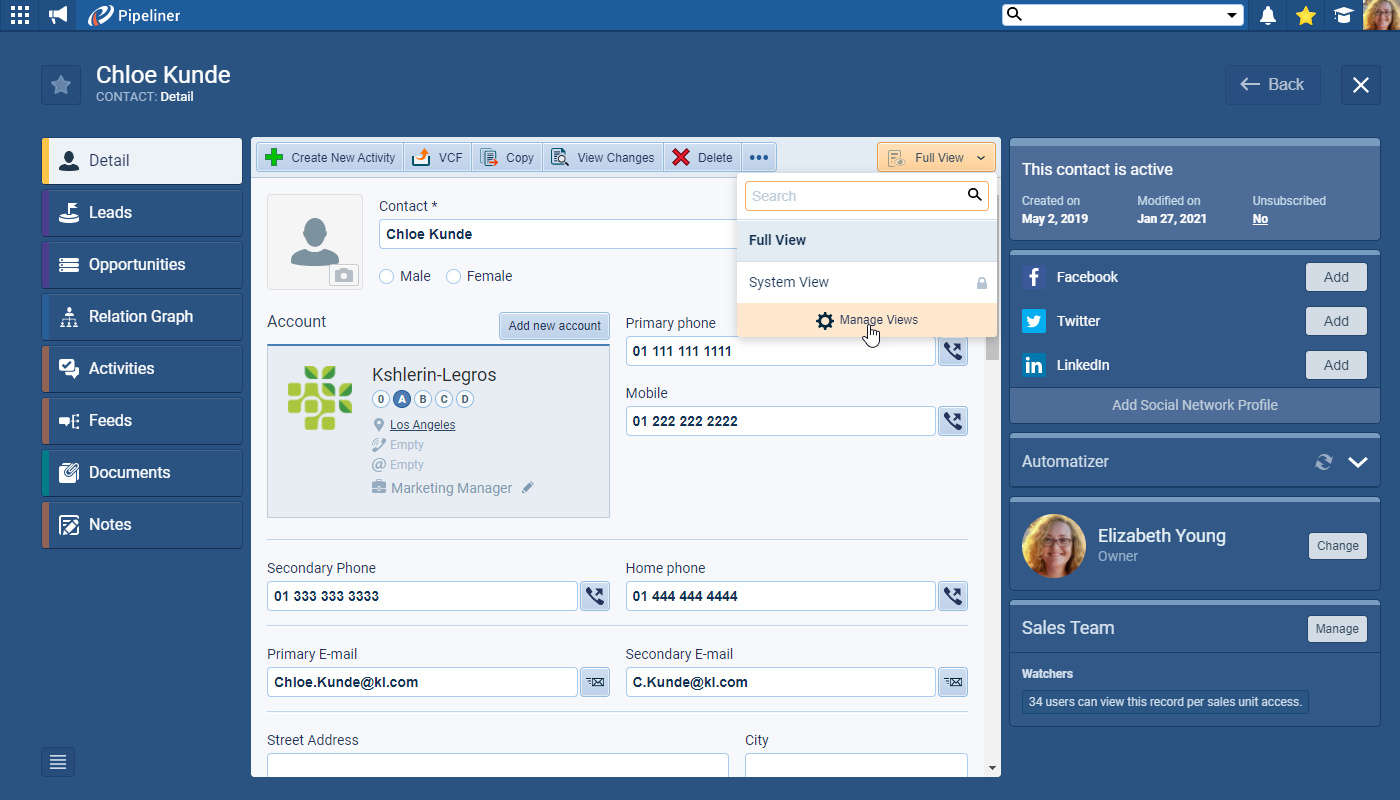
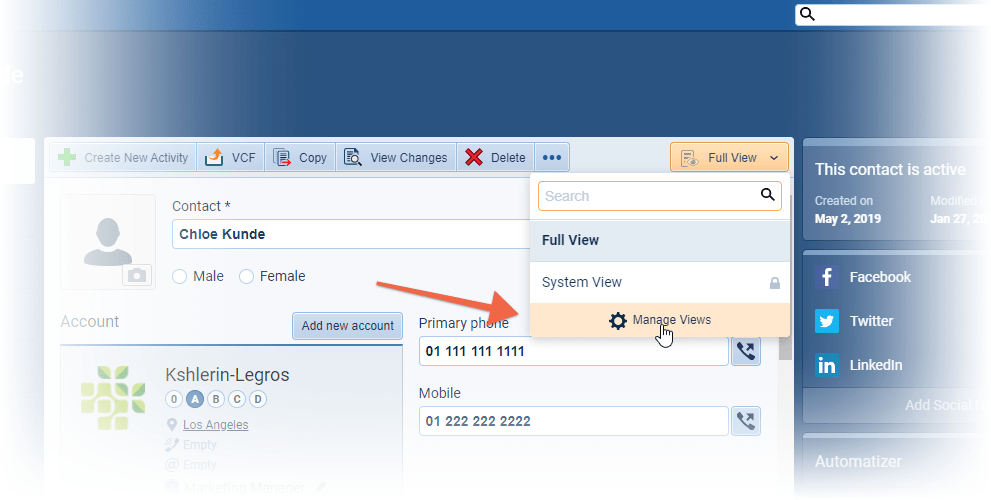
Access “Multiple Form Views” from within an open record by clicking on the “Views” dropdown and selecting “Manage Views”. ⤵
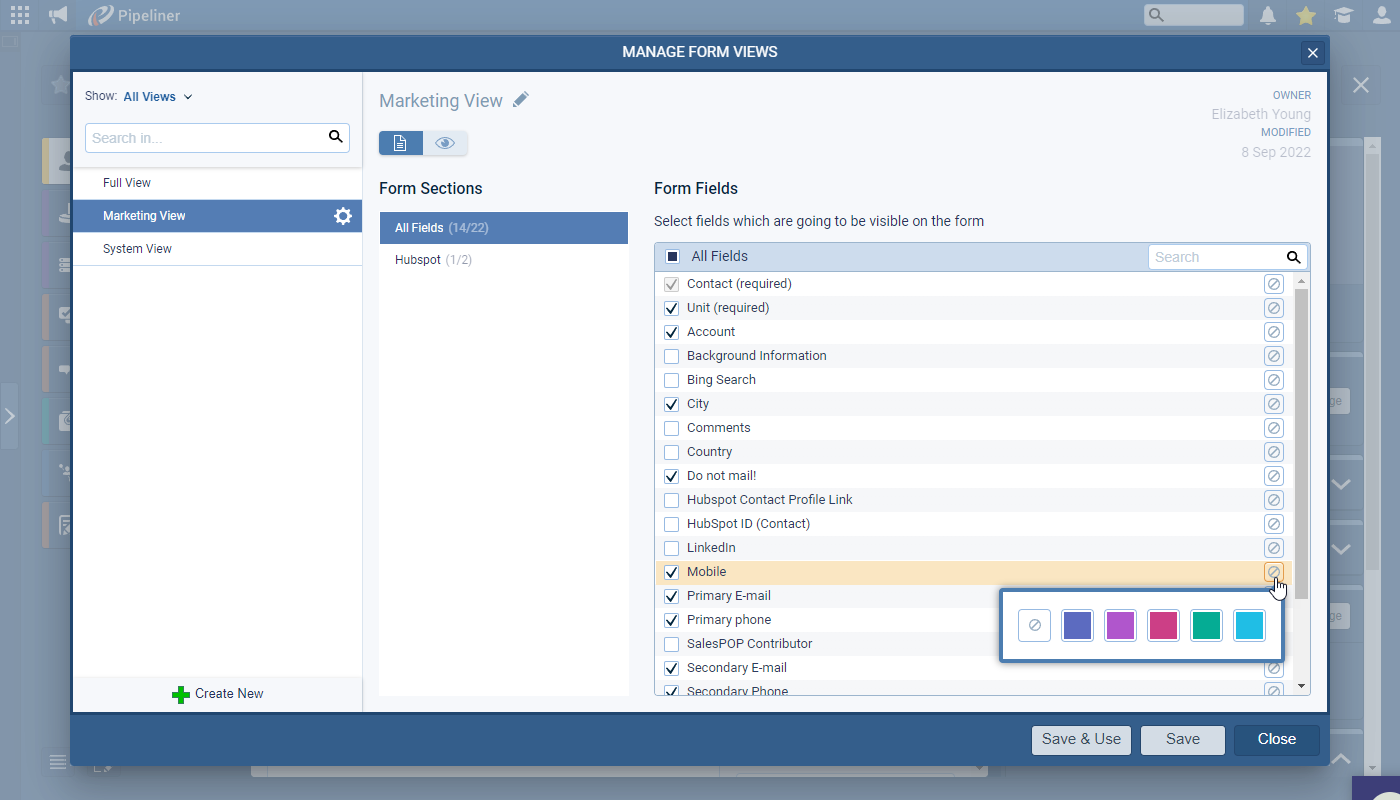
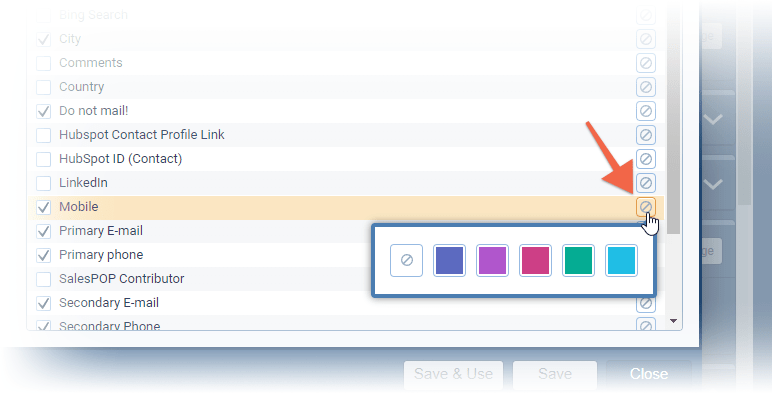
Select a field to be highlighted and then click on the icon on the right and choose which colour to use. ⤵
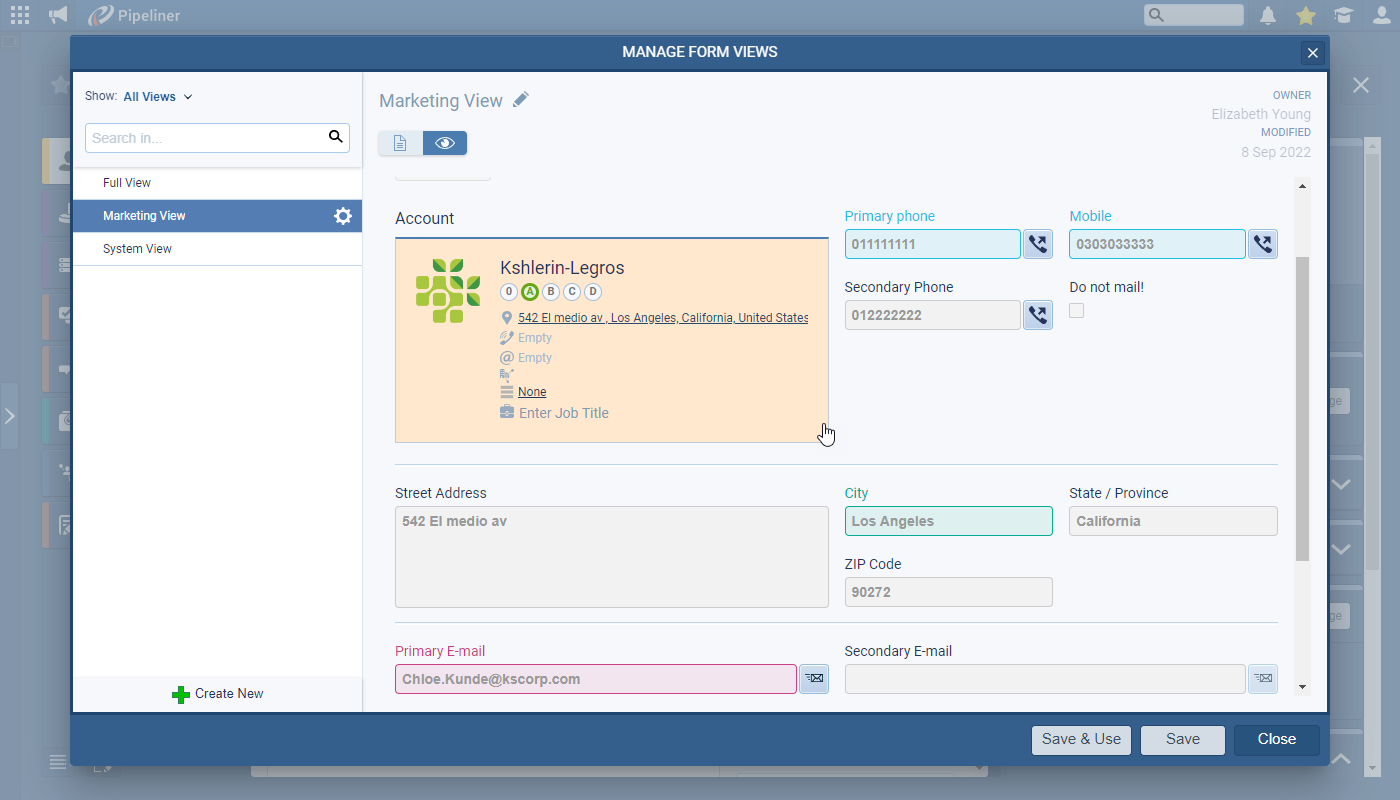
Use the “Preview” to see the effect of the highlighting. ⤵
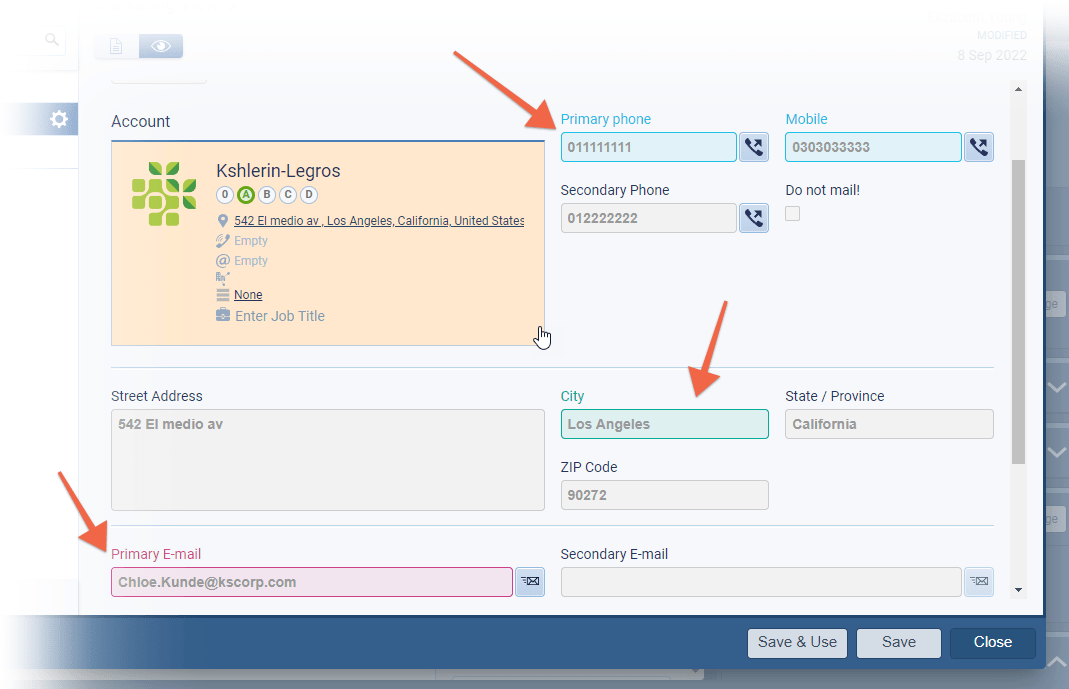
Highlighting is individual to each “Form View” so different views can highlight different fields.
Check our Knowledge Base article to get more information about Form Fields Highlighting ›
Qualification + Won Form
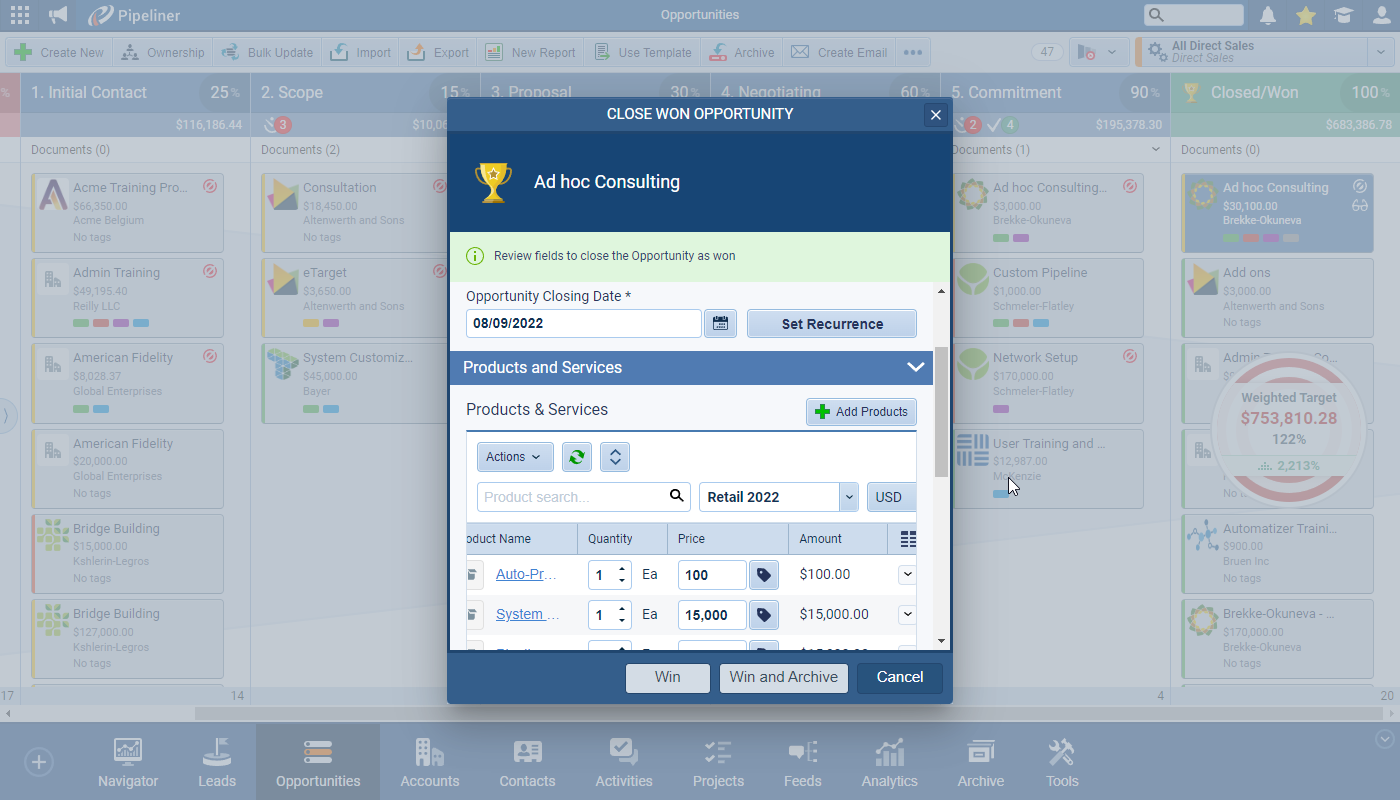
Pipeliner Admins can now choose to make additional fields visible on the “Opportunity Qualification” and “Opportunity Won” Forms so that users can check and verify additional field dataData Data is a set of quantitative and qualitative facts that can be used as reference or inputs for computations, analyses, descriptions, predictions, reasoning and planning. before saving the new “Opportunity” or winning the deal. ⤵
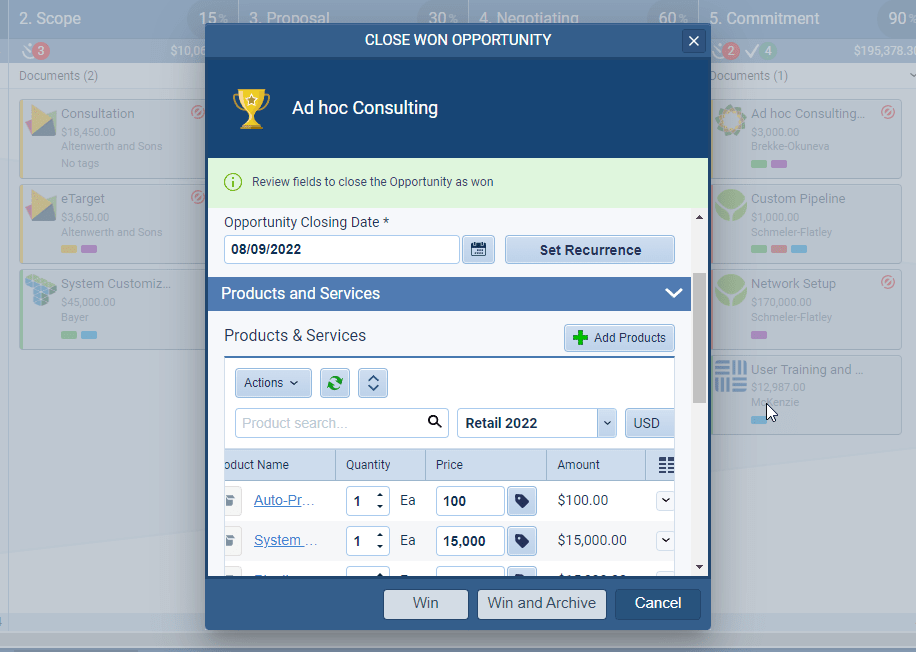
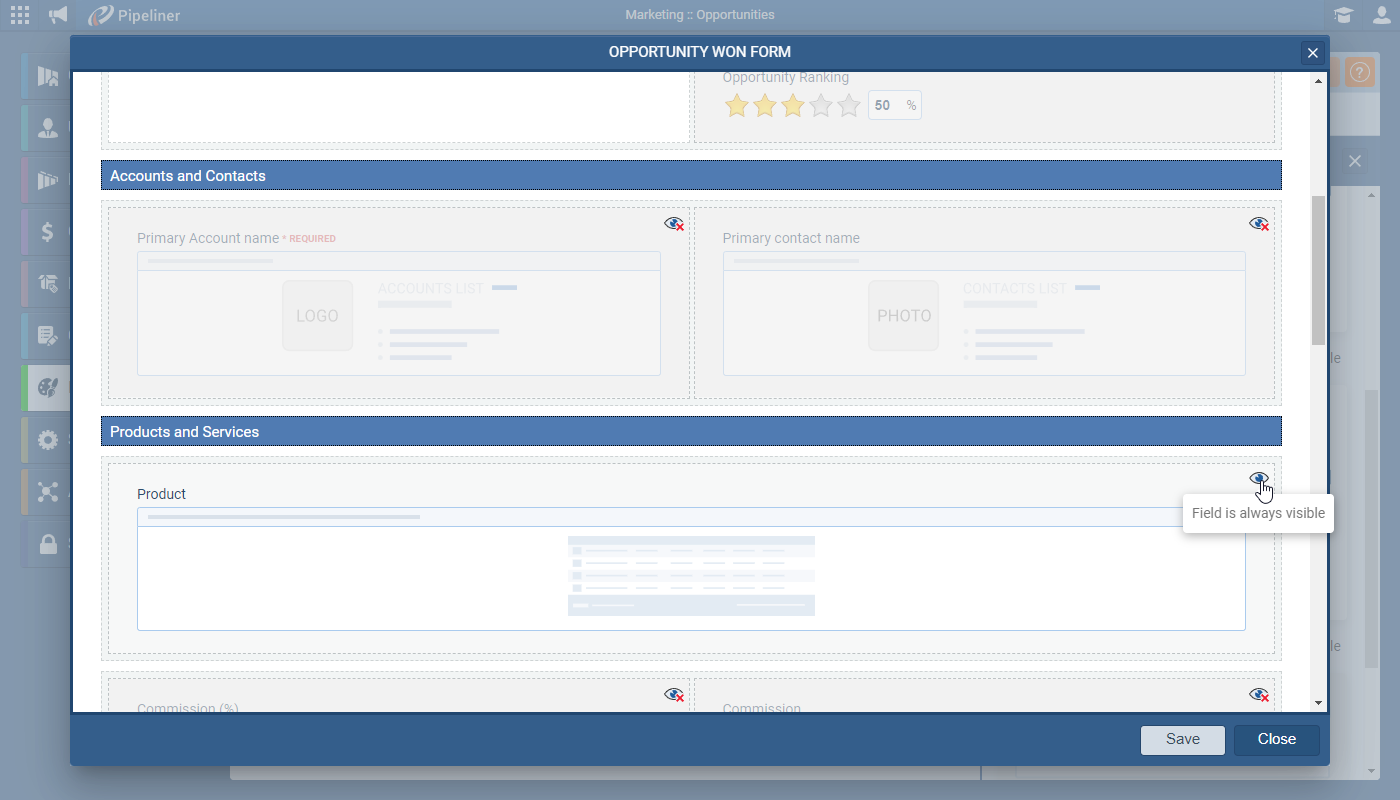
Enable visibility by editing the “Won Opportunity” Form in the Forms tab for “Opportunities” in “Fields & Forms” in the Admin Module. ⤵
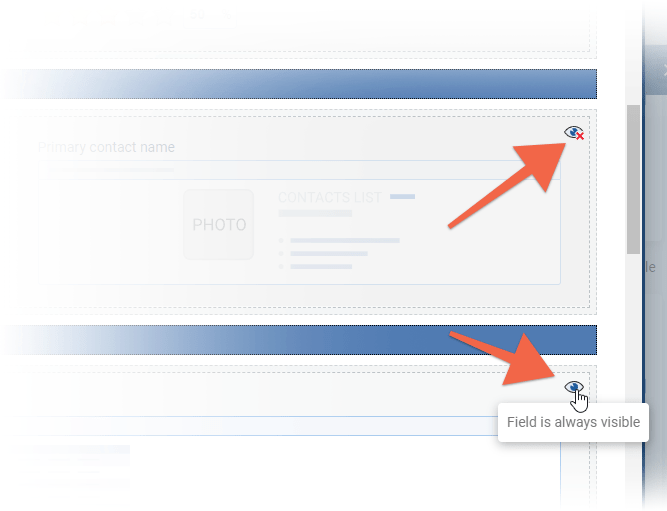
If you have multiple Opportunity processes, you can set up different “Qualification” and “Won Forms” for each one. All mandatory (required) fields (including system fields such as Name or Closing Date), calculated fields and fields that contain invalid data will always display on these Forms.
Check our Knowledge Base article to get more information about Qualification & Won Form ›

Pipeliner CRM is getting better and better with each new release. If you’re curious, about what other releases we had, please visit our “Release Notes” section.
Theory Made Real
Based on proven economic principles, Pipeliner CRM is a tool for everyone. Read more

