October 17th, 2024
We are happy to announce our newest release of Pipeliner CRM.
This release includes another exciting batch of new features for our app and other improvements to existing functionality.
Please note that some of these features are only available for our Business, EnterpriseEnterprise Enterprise (in the context of sales) is a relatively large organization typically composed of multiple levels, locations, and departments which need multi-layer software systems that support collaboration across a large corporate environment., or Unlimited Tiers.
Voyager AI › Email Categorization
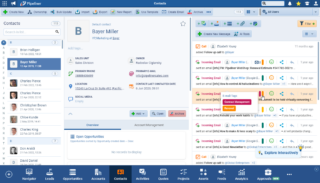
Voyager AI now includes the ability to automatically categorize emails captured in Pipeliner to set Tags and analyze Sentiment. As well as allowing instant visibility of the current “state of play” of a Contact or AccountAccount Account refers to a record of primary and background information about an individual or corporate customer, including contact data, preferred services, and transactions with your company., users can also filter records based on current Sentiment or applied Tags allowing them to respond appropriately and can also create reports and analyze records. ⤵

Email Tags & Sentiment are now always available on emails and can be set manually by users if the “Voyager AI › Email Categorization” option is not enabled in the Automation Hub. There is a predefined set of email Tags, that can be managed in the Admin module and the AI uses only this predefined set of Tags for categorization. Only new (from the 5.9 release date), incoming emails will be processed automatically.
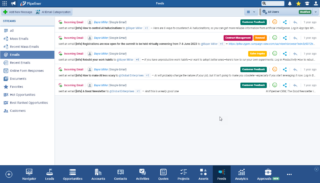
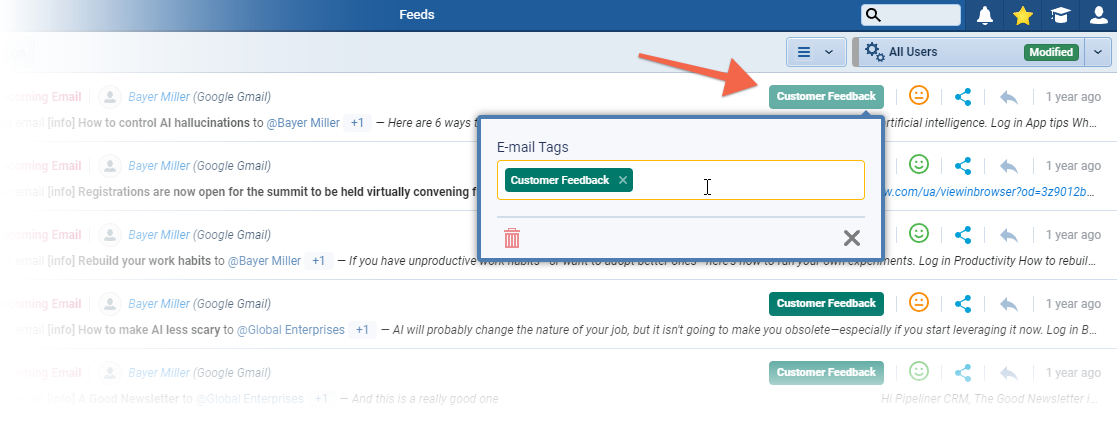
Tags and Sentiment are visible in the main Feeds tab as well as the Feeds tab for an individual record. Users can edit both Tags and Sentiment manually. ⤵
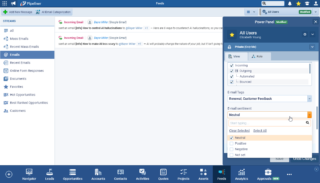
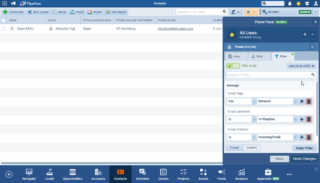
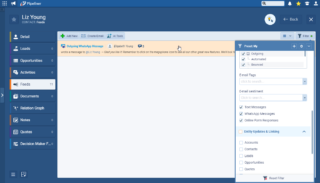
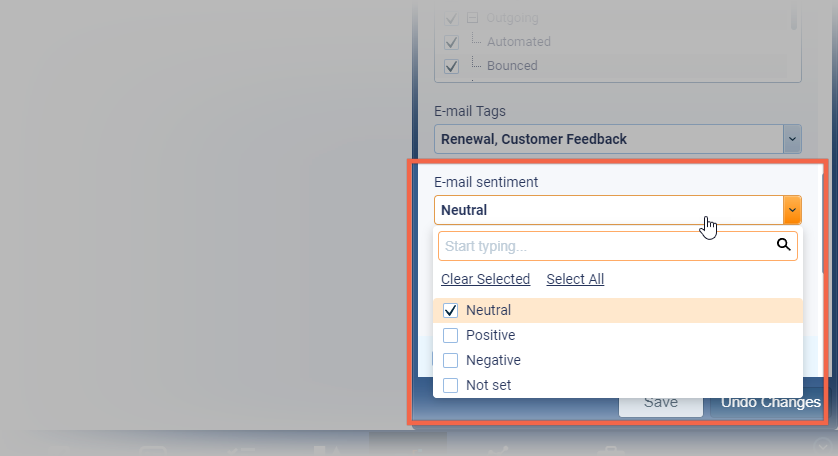
Emails in Feeds can be filtered by Email Tags and Sentiment. ⤵
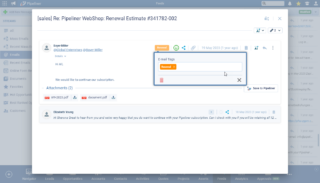
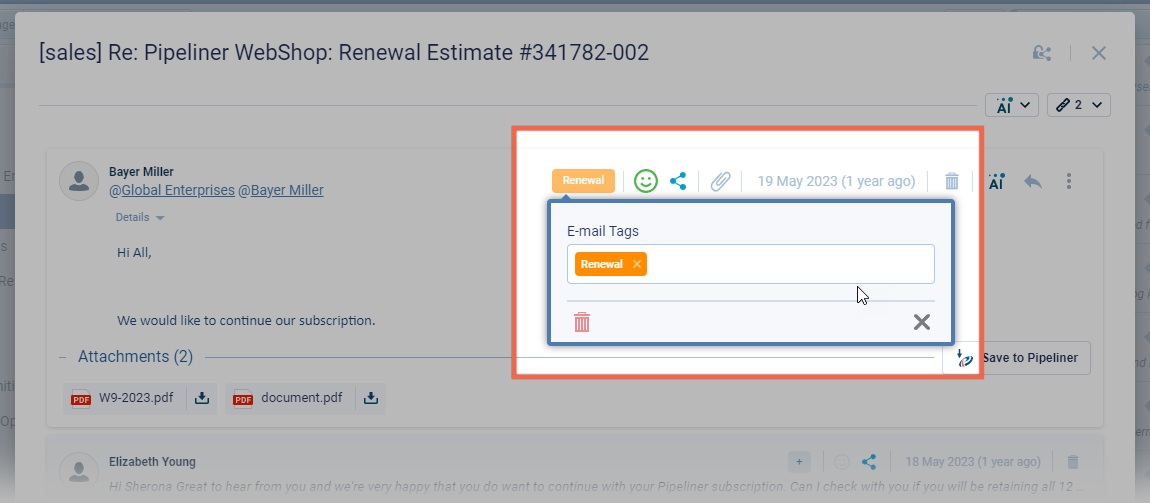
Tags & Sentiments are visible in the email detail and are editable by users. ⤵
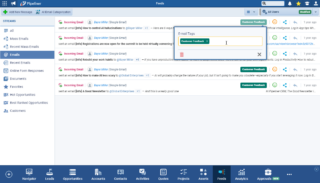
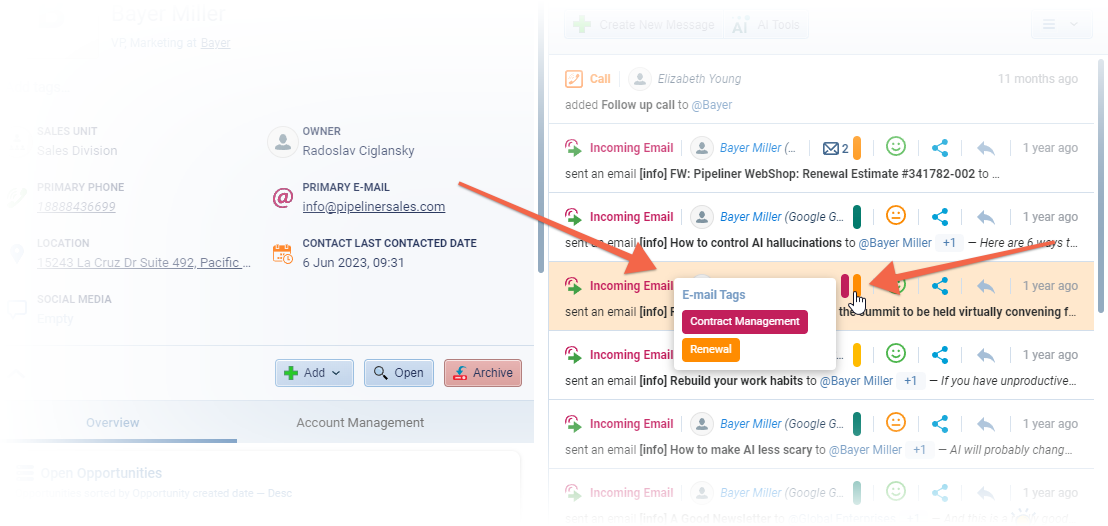
Email Tags & Sentiment display in the “Compact View” with the Tags in a reduced form. Hove over the Tags to see the full text. Tags and sentiment can both be edited by users. ⤵
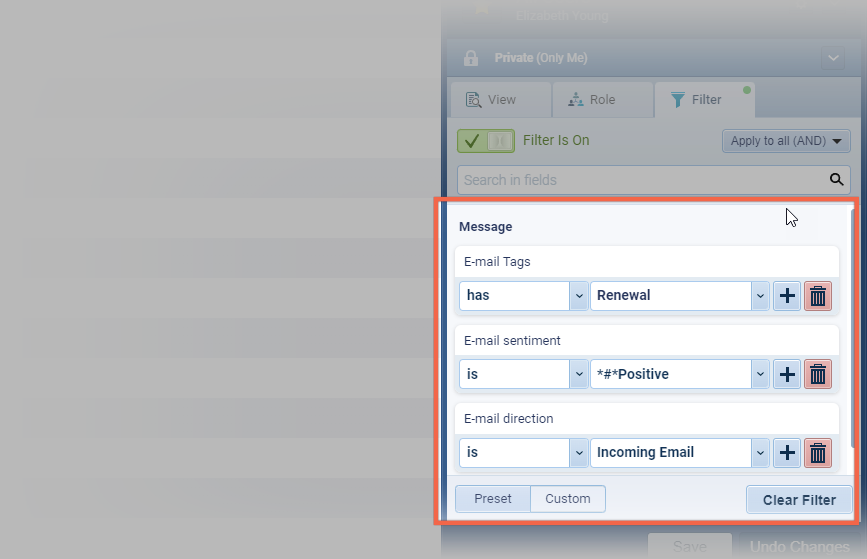
There are 3 new fields which can be used for filtering and reporting on Account and Contact Messages. These new fields are available in visible columns, for grouping, filtering and charts:
- “Email Tags” › all non-deleted tags
- “Email Sentiment” › 3 options
- “Email Direction” › Outgoing, Incoming
AI Email Categorization
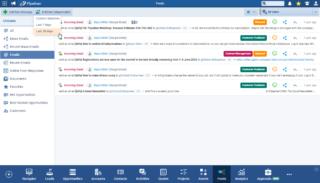
This button is available in the main Feed & the Feeds Tab for a record. This action will allow the AI to process all incoming emails (by the selected date range) and will set Tags & Sentiment. ⤵
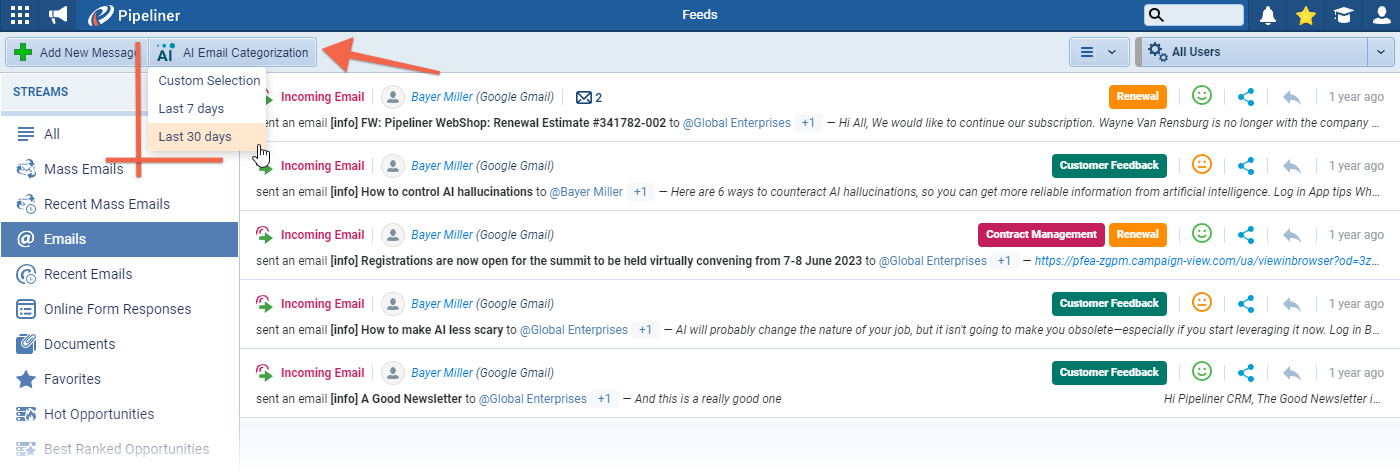
The options are:
- “Custom Selection” › userUser User means a person who uses or consumes a product or a service, usually a digital device or an online service. can manually select emails for AI processing
- “Last 7 days” › all incoming emails from the last 7 days
- “Last 30 days” › all incoming emails from the last 30 days
Automation Hub › Voyager AI Assistant module
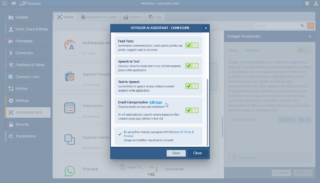
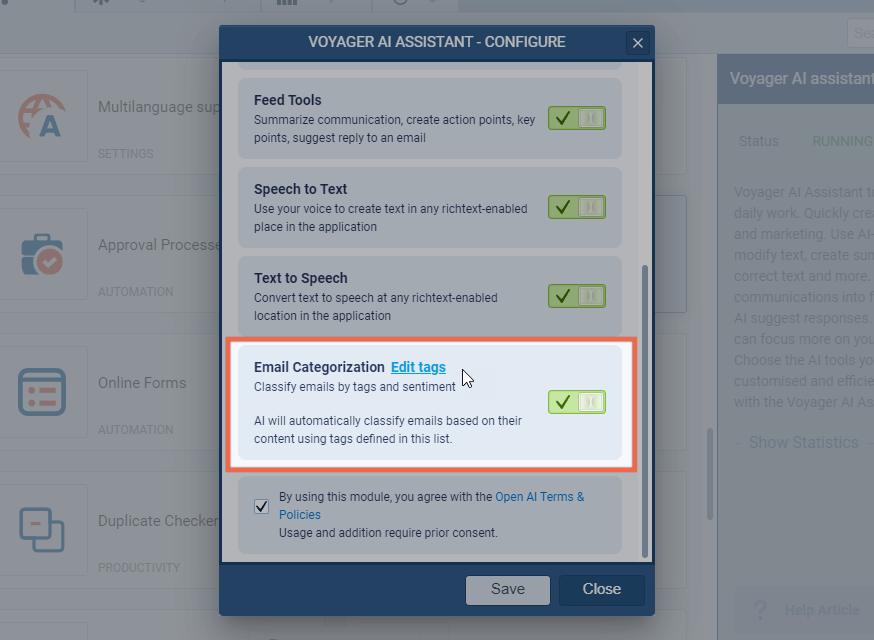
“Email Categorization” is enabled, or disabled, from the Voyager AI Assistant module in the Automation Hub. This feature is “ON” by default for active or newly activated modules. When switched “OFF“, automatic categorization will not work, and all respective AI buttons will hide. Users will still be able to categorize emails manually. Email Tags can also be edited by clicking on the “Edit Tags” link. ⤵
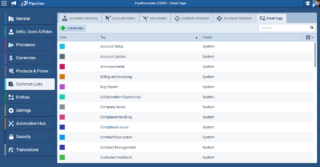
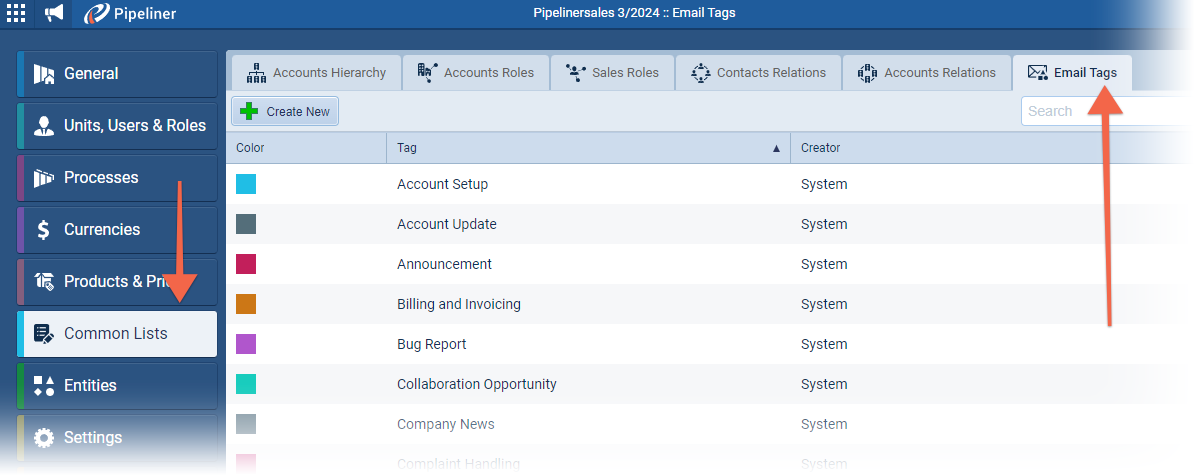
Email Tags can also be edited from “Common Lists › Email Tags“. A predefined set of tags with predefined colors will be created when the feature is enabled. Admins can add/remove/edit Tags as needed. ⤵
NOTE: Users can also add “Tags” within CRM as long as they have the corresponding permission in their “User Role“.
Fullsize Screenshots ⤵
WhatsApp MessagingMessaging Messaging is the process of communicating your brand’s value proposition, the benefits you offer, and the perceived meaning of such communication among your target audience. Integration
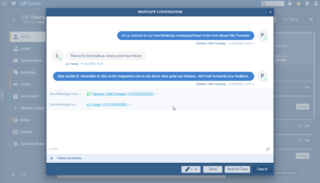
WhatsApp is increasingly used by businesses as a way to keep in touch with customers and to quickly answer queries. Available as a paid-for add-on for all subscription tiers, the WhatsApp integration can be activated from the “Automation Hub” and, once the Terms & Conditions have been accepted and the add-on is running, personal and business WhatsApp accounts can be added to Pipeliner and used to create new conversations and track previous conversations from the Feeds tab. ⤵
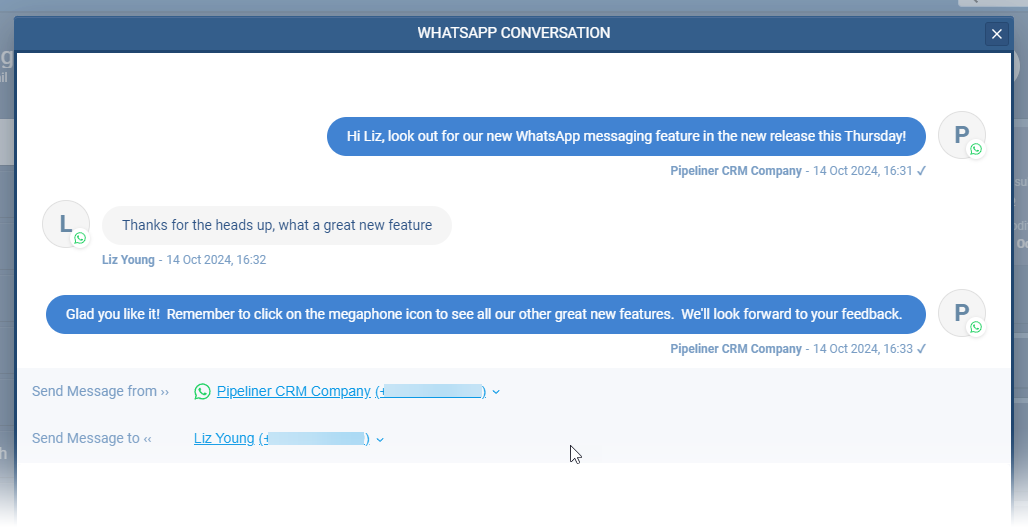
The WhatsApp integration is available as an add-on chargeable option for customers on all subscription tiers. If you want to add it to your subscription, please contact customer-success@pipelinersales.com or your relationship manager directly.
The WhatsApp integration is enabled from the Automation Hub in the Pipeliner Admin Module. Your Pipeliner Admin will need to agree to the “WhatsApp Terms & Policies as well as the Unipile Terms and Privacy Policy“.
Once active and running, WhatsApp accounts can be added as a “Company” WhatsApp account (which can be used by multiple users that have permissions to do so) by a Pipeliner Administrator or users can add their own WhatsApp accounts as personal accounts.
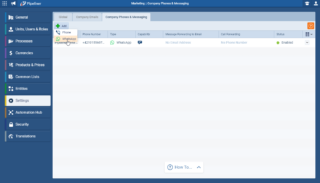
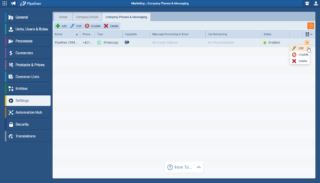
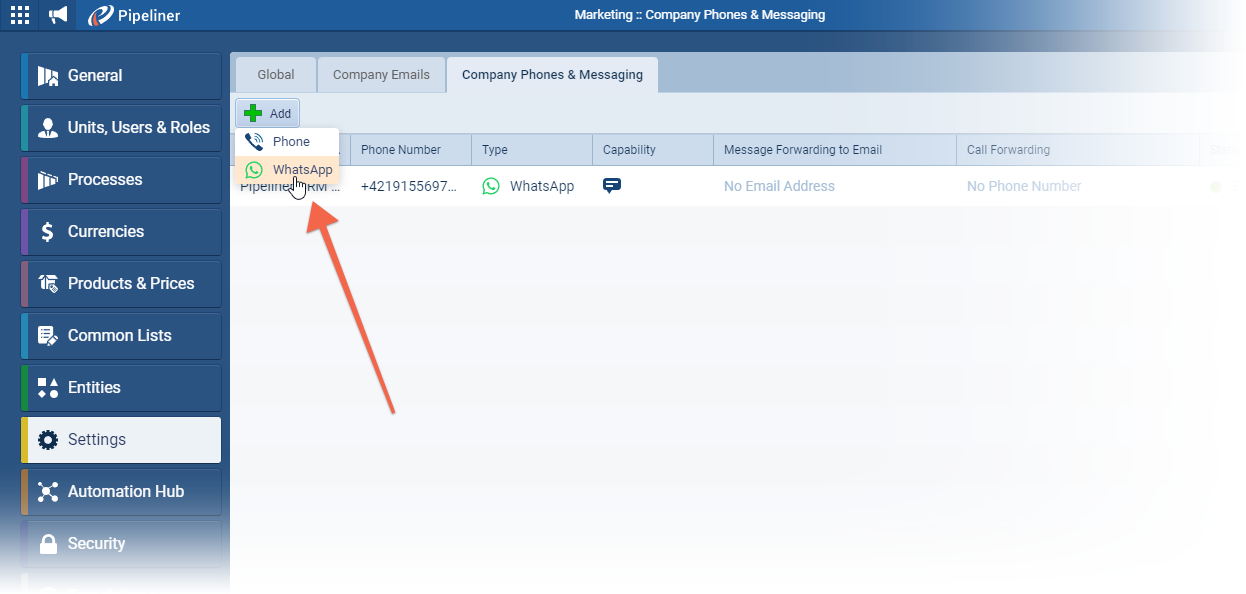
From the “Settings” menu in the Admin Module, select the newly renamed “Company Phones & Messaging” tab and then click on “Add › WhatsApp” and then acknowledge acceptance of the terms and conditions to “Continue” ⤵
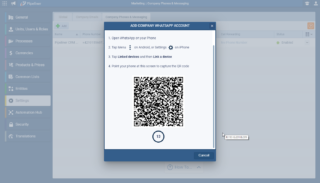
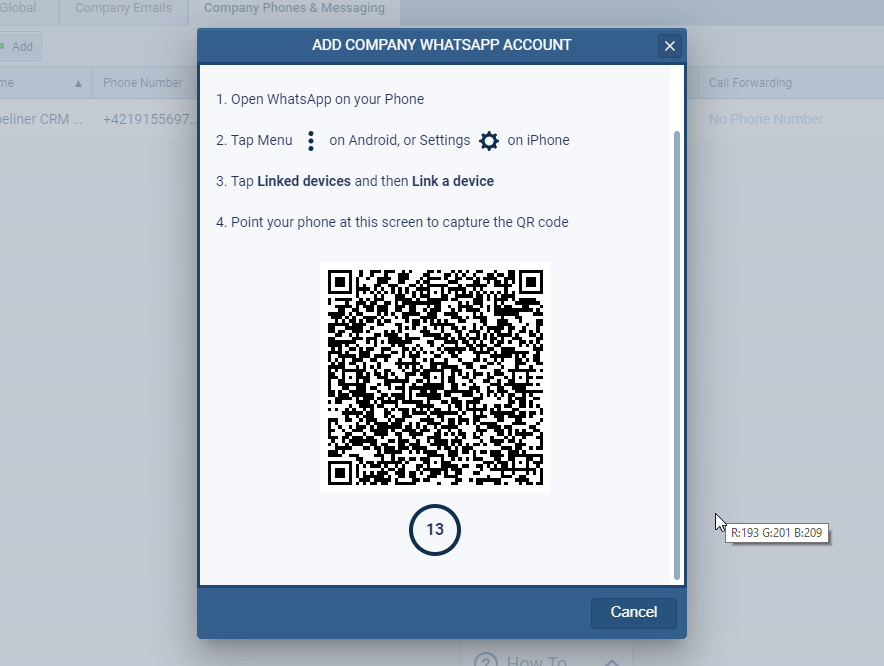
Follow the instructions on screen to scan the QR code to connect the account ⤵
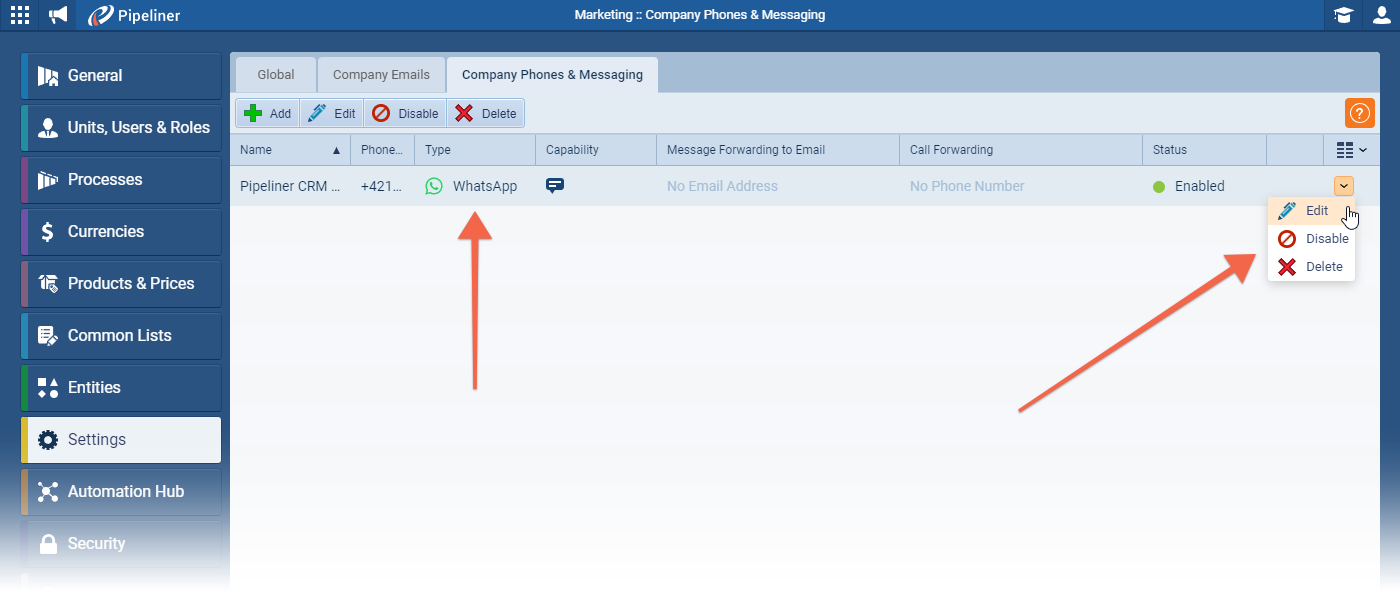
The account will then be listed as “Enabled“. Clicking on the dropdown arrow on the right will allow Admins to “Edit” the name, “Disable” or “Delete” the account ⤵
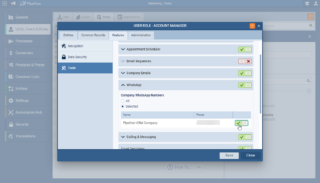
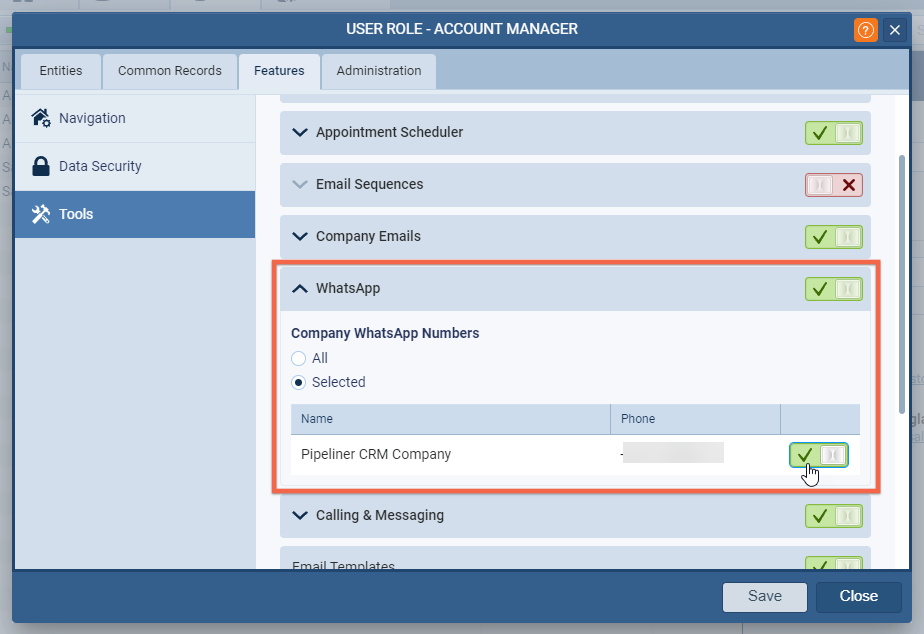
Admins will want to ensure that only users based on specific User Roles have the rights to use the WhatsApp integration. They will need to edit each “User Role” by clicking on “Features › Tools” then “Enable” (or “Disable“) WhatsApp and select which, if any, company WhatsApp account users based on this role should have access to. Click on “Save” to apply changes for all users currently based on that User Role ⤵
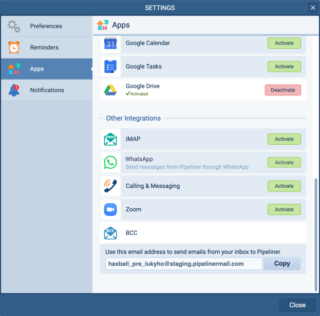
Users can add their individual WhatsApp accounts from inside the web app. Click on the user avatar icon in the top right and then on the “Settings” button. Then choose the “Apps” tab and then scroll down until the user sees WhatsApp and then click on “Activate” ⤵
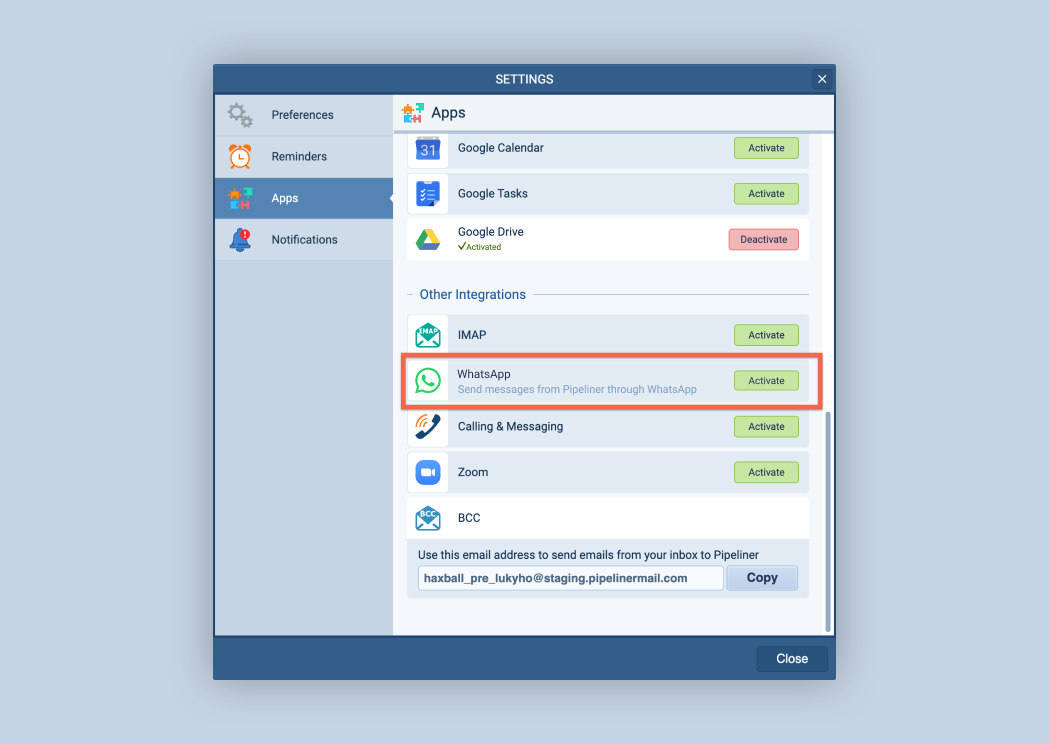
The user will then need to follow the instructions on screen to accept the T&Cs and then scan the QR code.
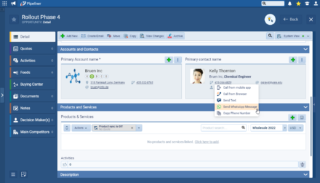
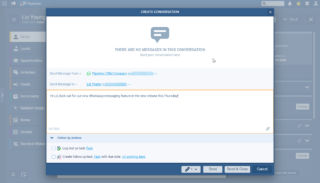
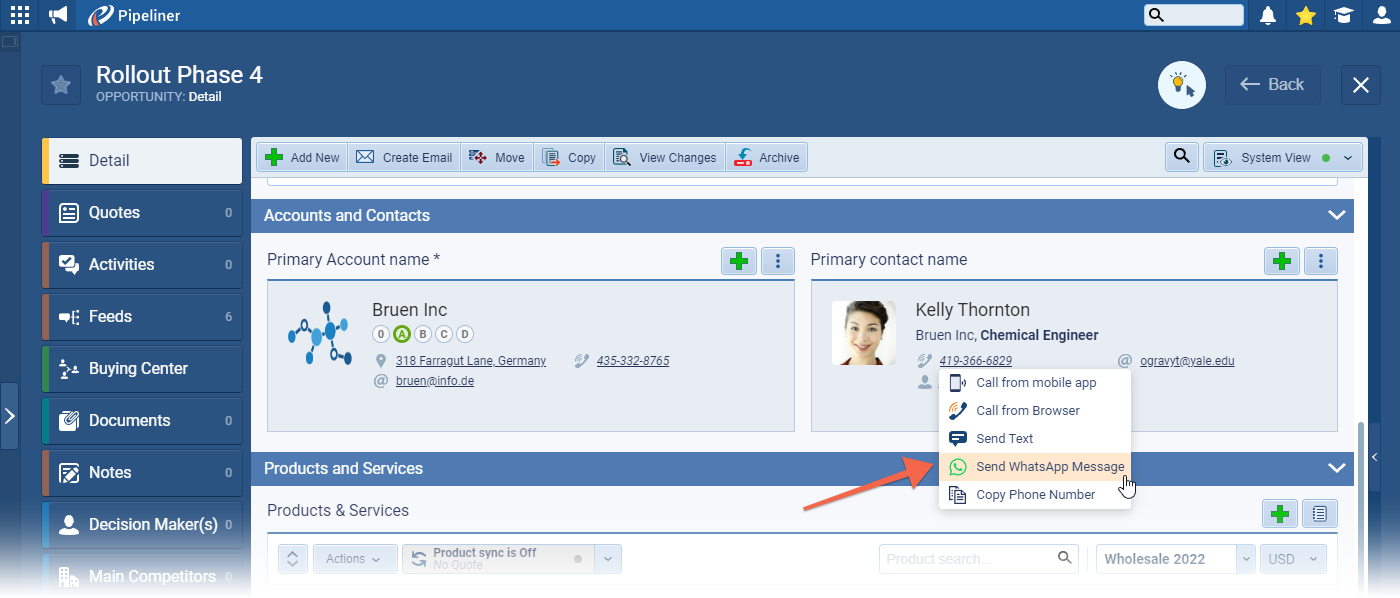
Once active, users can send a WhatsApp message to an Account or Contact by clicking on a phone number and choosing “Send WhatsApp Message” ⤵
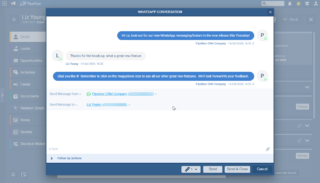
Type or paste the message into the “Create Conversation” window ⤵
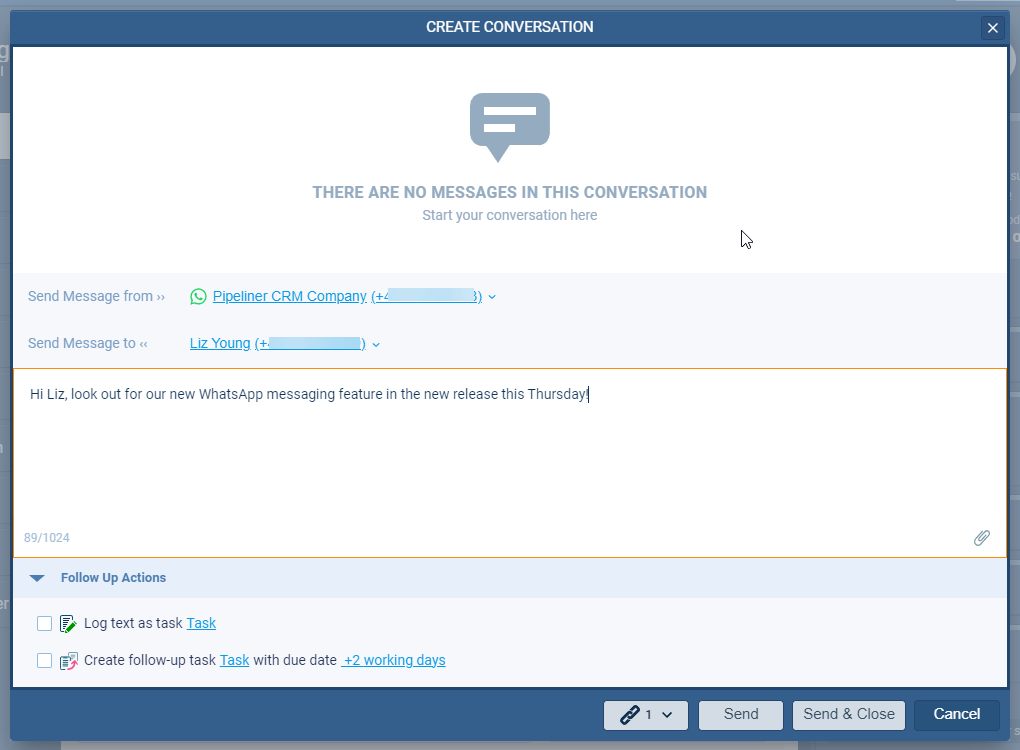
- “Send Message From” › if users have access to a personal WhatsApp account as well as a company WhatsApp account, they’ll be able to select which account to send the message from
- “Send Message To” › will be the phone number that was selected. If the number is not associated with a WhatsApp account, an alert will be shown.
- “Attach” › attach files by clicking on the paperclip icon
- “Log message as a Task” {choose task type} › create a task that will be visible from the Activities tab (and which can be reported on with other tasks such as calls)
- “Create follow-up task” {choose task type} “with due date” {choose due date} › schedule a follow-up activity
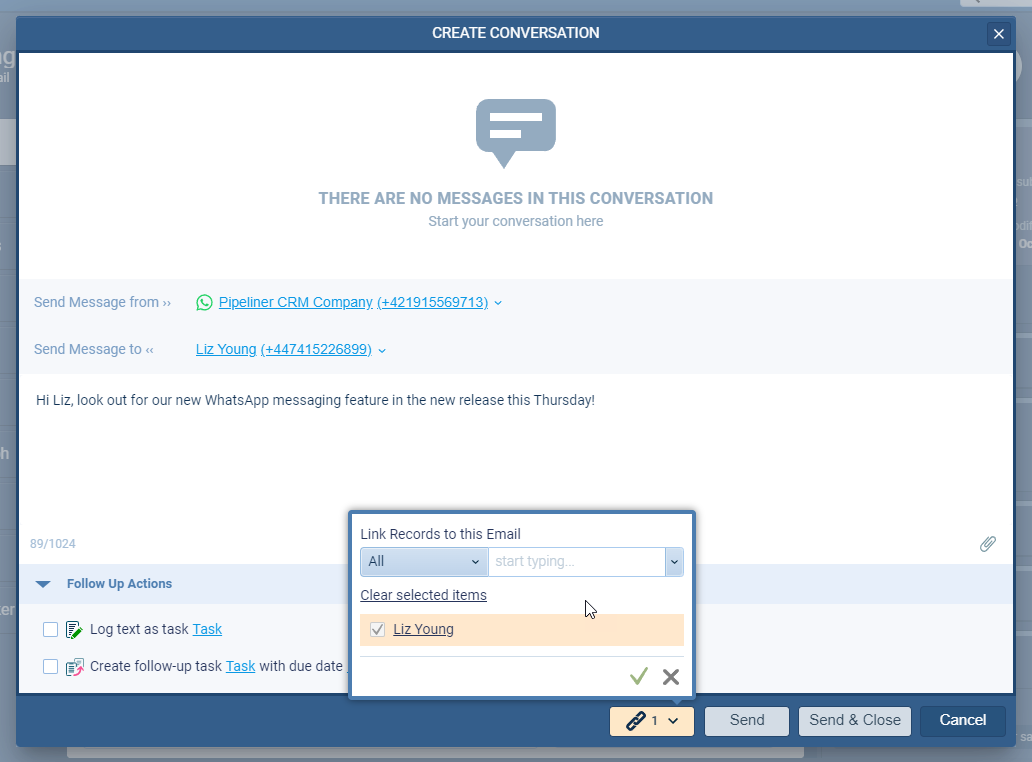
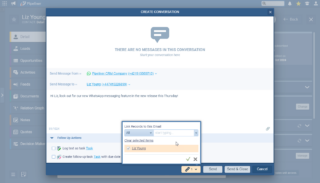
Click on the chain icon to link the message to additional records and then click “Send” to send the message, “Send & Close” to send and close the conversation window or “Cancel” to cancel the message before sending.
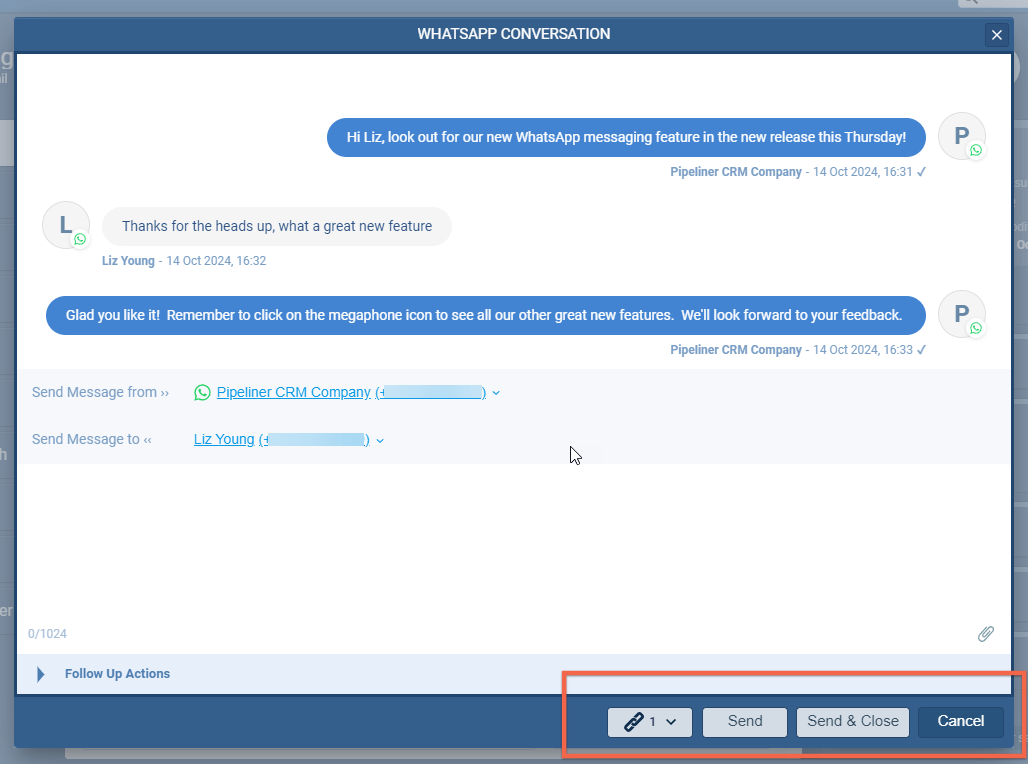
You can also send a WhatsApp message by clicking on “New Conversation” from the main menu “New” button or by choosing “Create Conversation › Standard” from the toolbar.
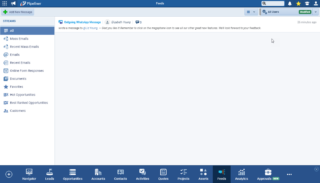
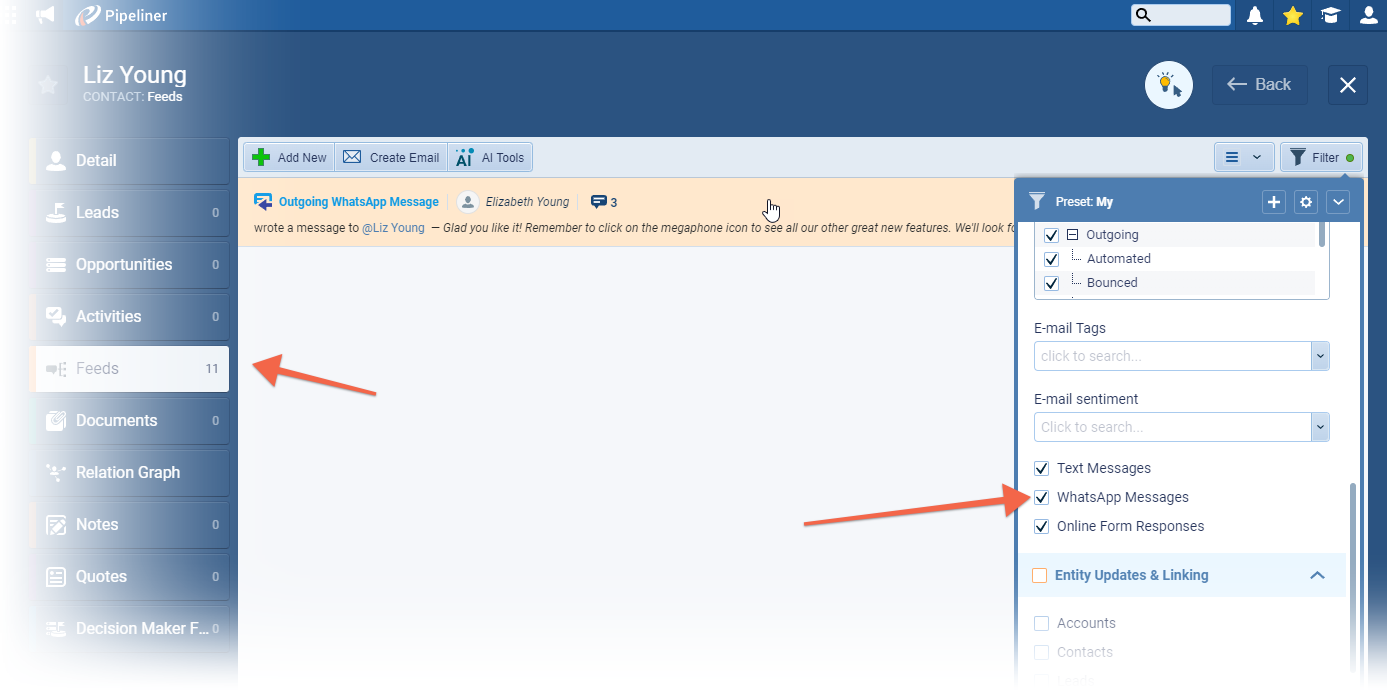
WhatsApp messages can be viewed from the main Feeds menu and from the Feeds of an individual record ⤵

WhatsApp Messages was added as filter option in “General Feed” and “Feeds Tab” on Records ⤵
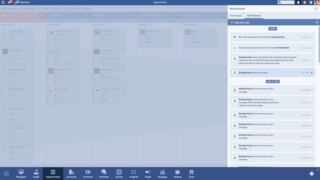
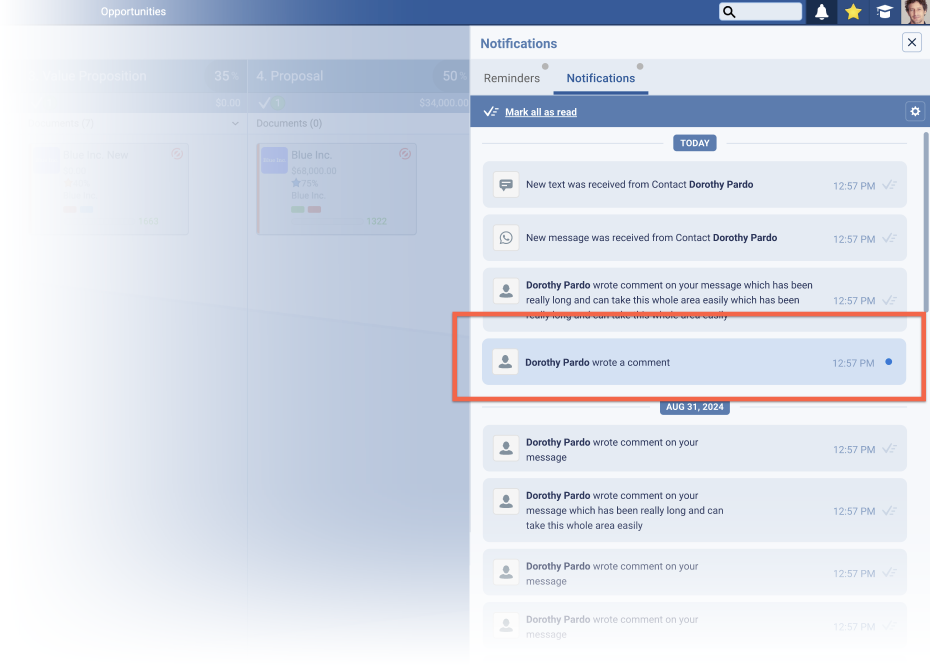
When a new message is received via WhatsApp, it will be shown in the In-App Notifications. This can be turned off in Notification Settings ⤵
Fullsize Screenshots ⤵
Experience Pipeliner CRM Now
Static Profiles (Static Lists)
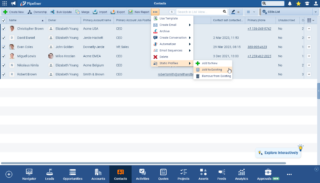
Static Profiles allows users to create a custom list of records which then remains static unless changed by the user. This is ideal for invitations and follow ups where you need to contact the same people on an ongoing basis and where a dynamic filter might have altered, changing the records displayed by a dynamic profile. Static Profiles are created from the main menu — users can…
- “Add to New” › Add selected record(s) to a new static profile (or create a new empty static profile)
- “Add to Existing” › Add selected record(s) to an existing static profile
- “Remove from Existing” › Remove selected record(s) to an existing static profile

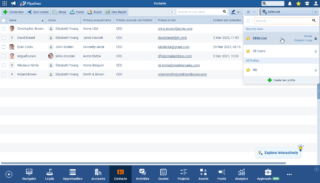
Static Profiles are visible in the Profile dropdown along with dynamic profiles ⤵
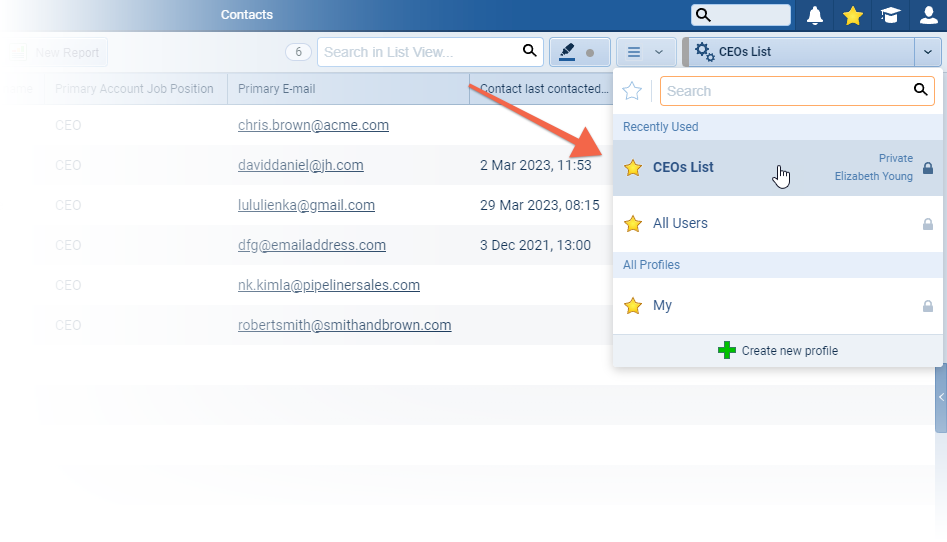
Static Profiles only support the “List View” and contain only the “View“, “Role” and “Filter” tabs. The Role and Filter tab cannot be modified after the profile is created. Static Profiles are not tied to processes.
Fullsize Screenshots ⤵
Interactive Help
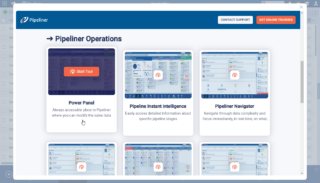
Our new Interactive Help tool is designed to help make Pipeliner even easier to use. ⤵
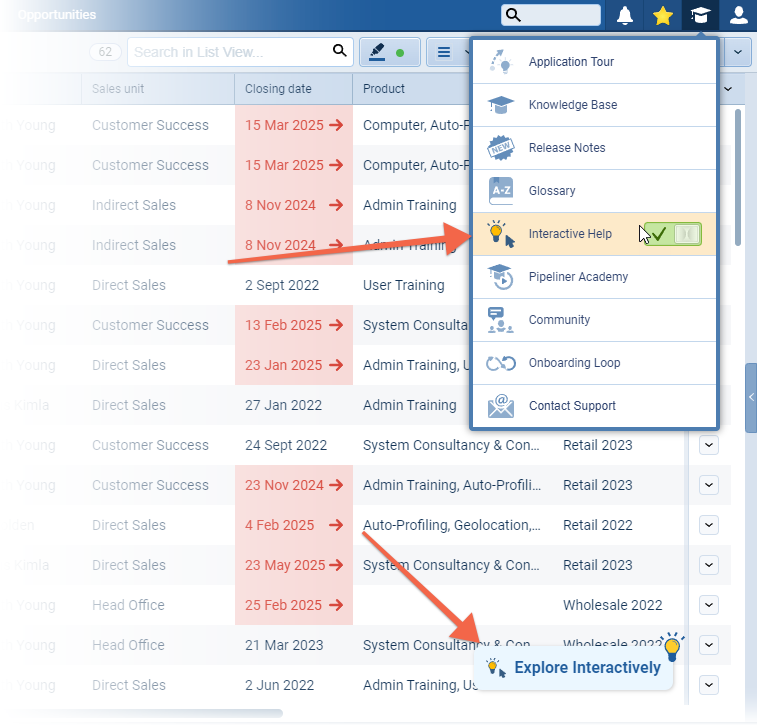
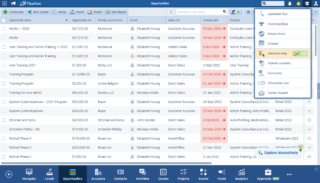
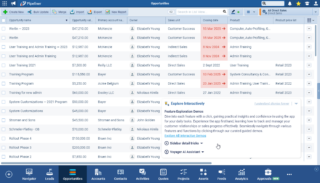
When a user clicks on the “Explore Interactively” button, they will be able to access a series of interactive demos that are directly relevant to the area of Pipeliner that they are working in. ⤵
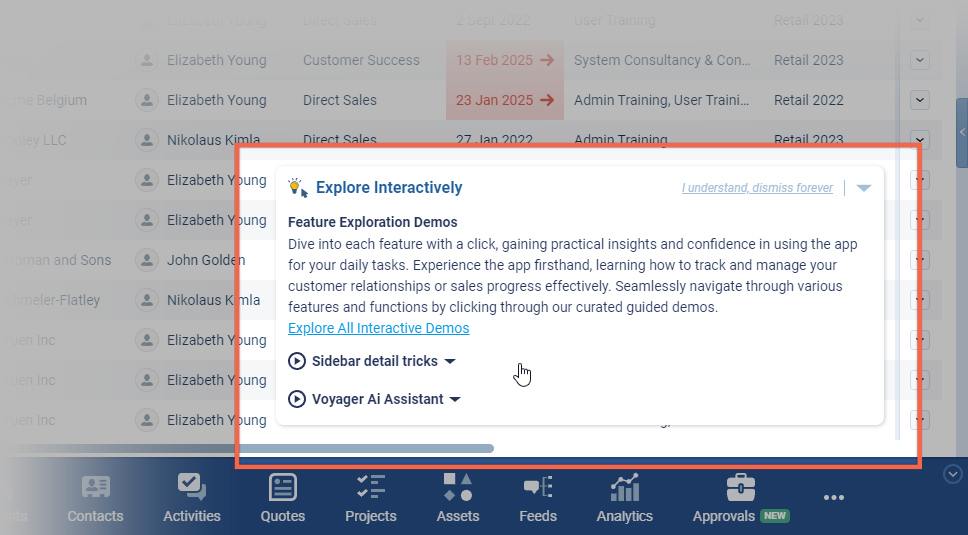
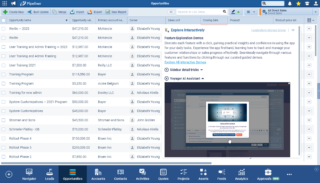
Clicking the name of the demo will open a preview image. ⤵
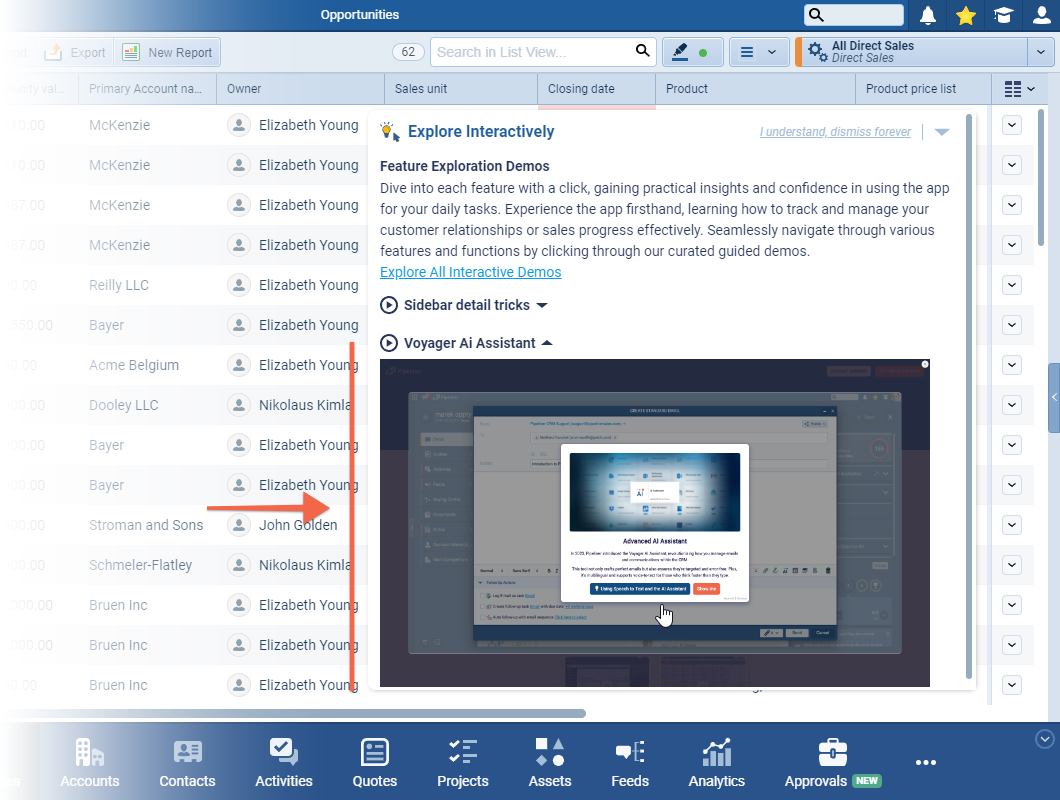
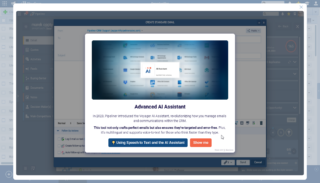
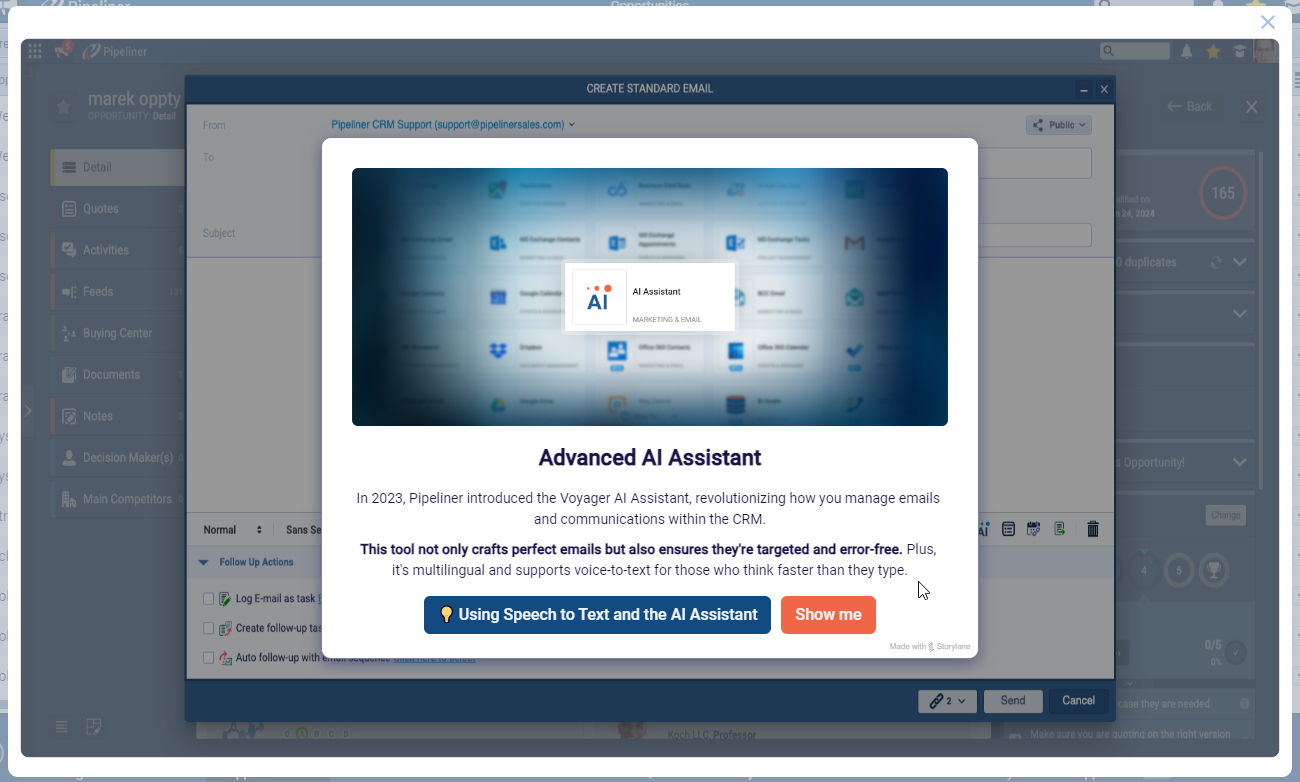
Clicking this image will open up the clickable demo. ⤵
Users can also click on “Explore All Interactive Demos” to open up the demo hub to explore additional features. ⤵
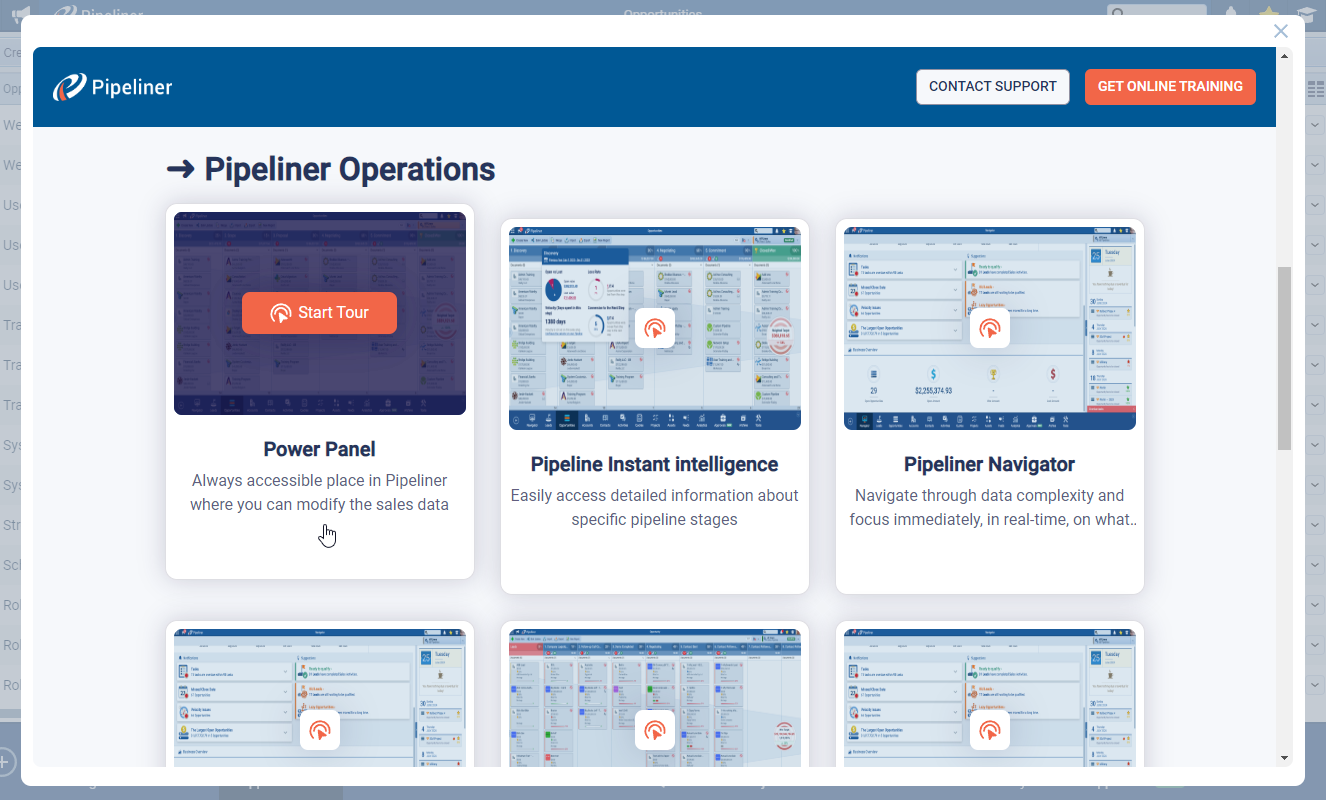
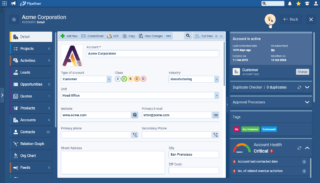
The interactive demos can also be accessed from wherever users see the lightbulb icon. ⤵
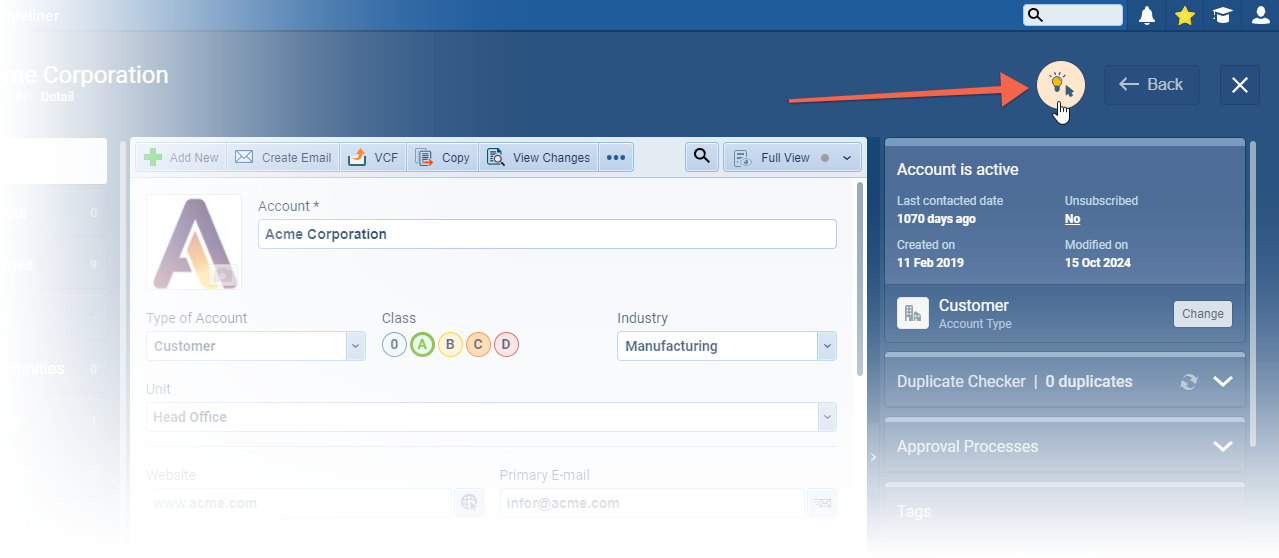
Users can “Enable/Disable” all Interactive Help by clicking on the graduation gap icon.
Fullsize Screenshots ⤵
Online Forms › Multiple Questions in One Row
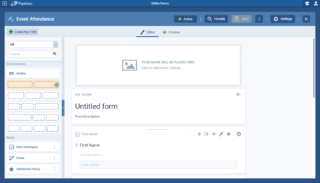
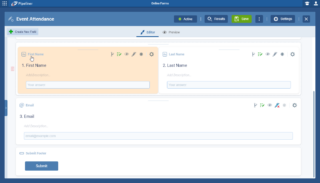
This release includes a significant update to the Online Form Editor making it easier to design dynamic and flexible forms. Users can now add multi-column containers. ⤵
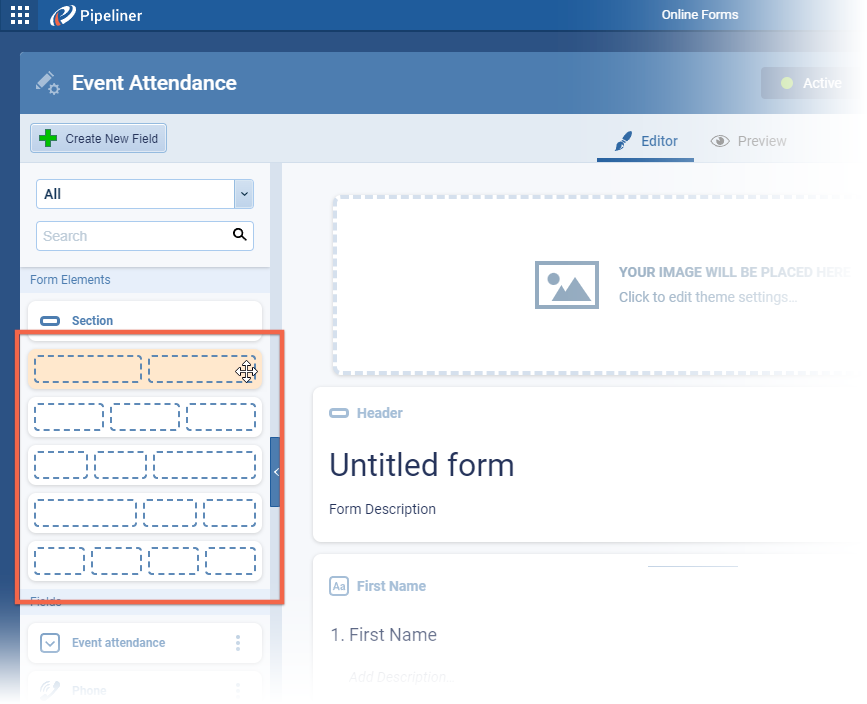
Just like working with record Forms in the Admin Module, users can enhance the layout of Online Forms by adding containers with the following configuration ratios: “1:1“, “1:1:1“, “1:1:2“, “2:1:1“, “1:1:1:1“.
Form layout is adaptive; all forms start in a single-column container. Adding a multi-column container expands the form width whereas removing the last container resets the form to its original starting width.
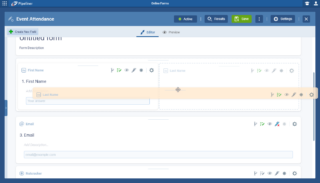
Users can reorder both fields and containers using drag & drop. Fields can be moved within a container or between different containers. ⤵

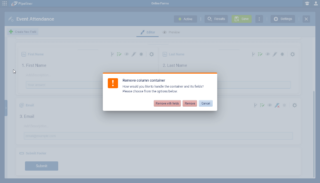
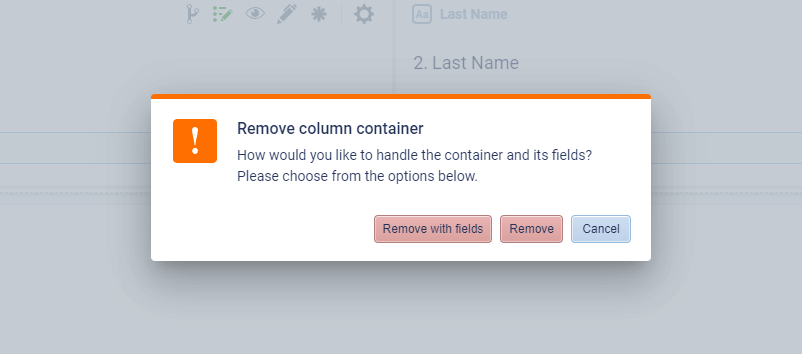
When removing a multi-column container, the user is prompted to select from the options to:
- Remove both container and fields
- Remove the container while preserving fields in a single-column view
We’ve also added placeholders for the field title and description fields for improved user guidance. ⤵
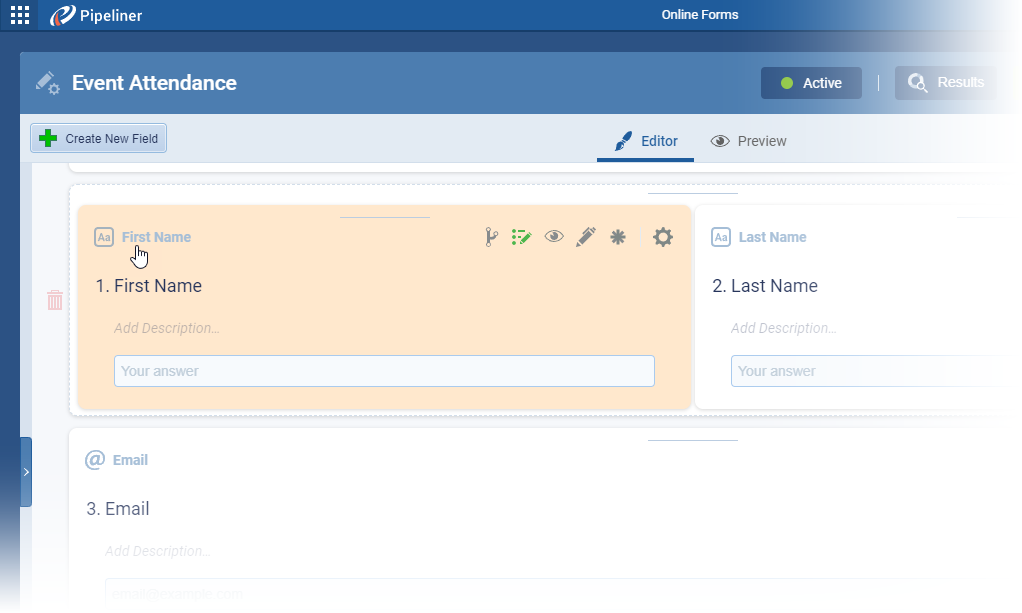
Fullsize Screenshots ⤵
Filter Presets in Feeds Tab
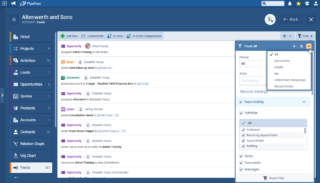
We have added “Filter Presets” to the “Filter” in Feeds tabs on records. This useful enhancement allows users to create their own Preset filters and quickly switch between them to find relevant Feeds without needing to check / uncheck options in the Filter. These new “Filter Presets” are shared across all entities.
There’s a new bar at the top of the the Filter window where users can:
- See what “Filter Preset” is currently selected.
- “Add“, “Rename” and “Delete” Presets.
- “Switch” between Presets.
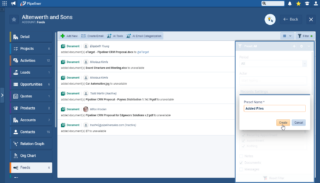
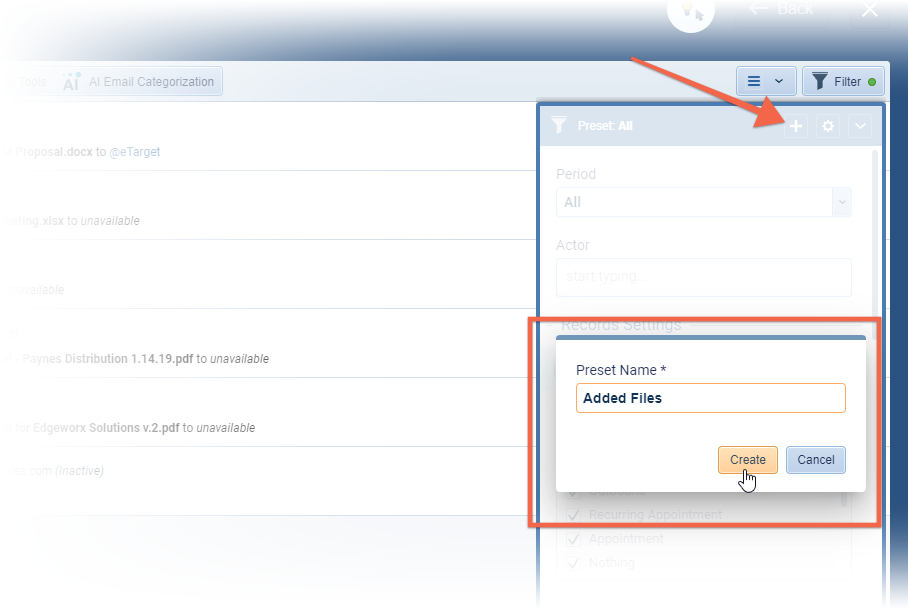
To add a Preset, users will click on the “+” button will open a pop-up to name the new Preset which will be created from the currently selected Filter options. ⤵
Presets can be “Renamed” or “Deleted” by clicking on the “Settings” button (gear icon).
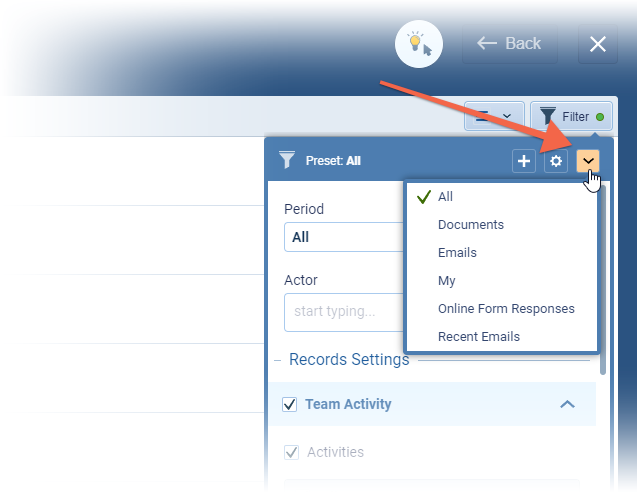
Clicking on the dropdown arrow will allow the user to select from all Presets. There are a few default options already (which users can delete if they prefer). The current selections are saved to the “My” preset which is pre-selected.
This option is currently only available for “Record Feed” tabs not the main Feeds menu.
Fullsize Screenshots ⤵
Forecast Improvements
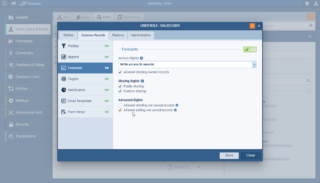
To facilitate working with Forecasts, we’ve added an additional permission to “Common Records › Forecasts” within “User Role” settings. Enable “Allowed editing not owned records” to allow users based on the role to edit all forecast values within visible forecasts even if they did not create (own) the forecast. ⤵
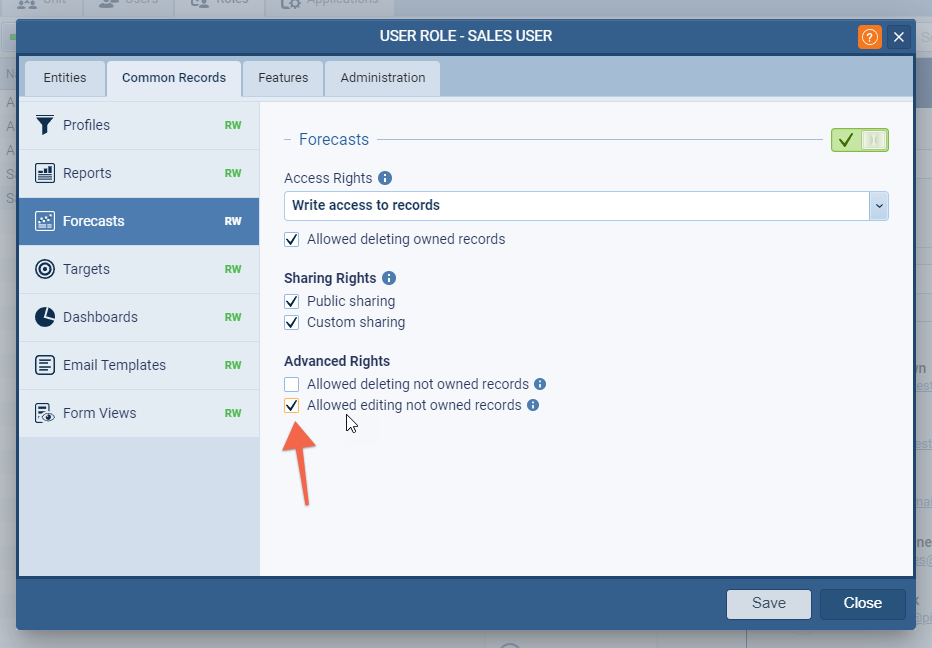
If this option is unchecked, permissions work as follows for Forecasts not owned by the user in question:
- If this is a “User” forecast, all included Users will have read-only access to this forecast
- a user can edit only their own values
- If this is a “Sales Unit” forecast, all Managers within all included Sales Units will have read-only access to this forecast
- only Managers of the individual sales unit can edit values
- In the case of an “Account” forecast
- a user can edit a value when they are the owner, or an editor, of the account
- In the case of “Products” or “ProductProduct Product refers to anything (an idea, item, service, process or information) that meets a need or a desire and is offered to a market, usually but not always at a price. Categories” forecasts
- users will see all records, and will not be able to edit any values
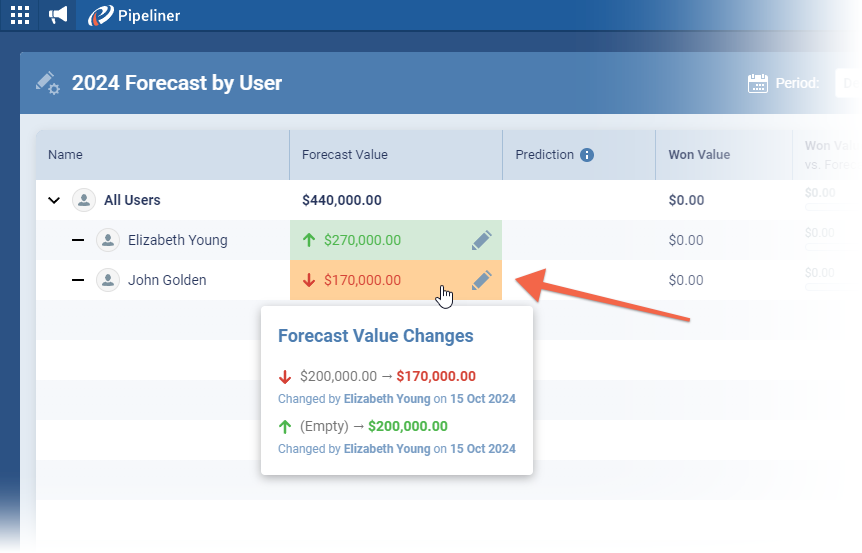
Forecast Value Changes
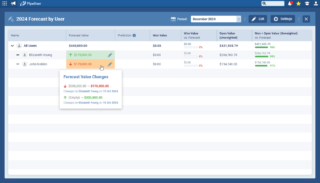
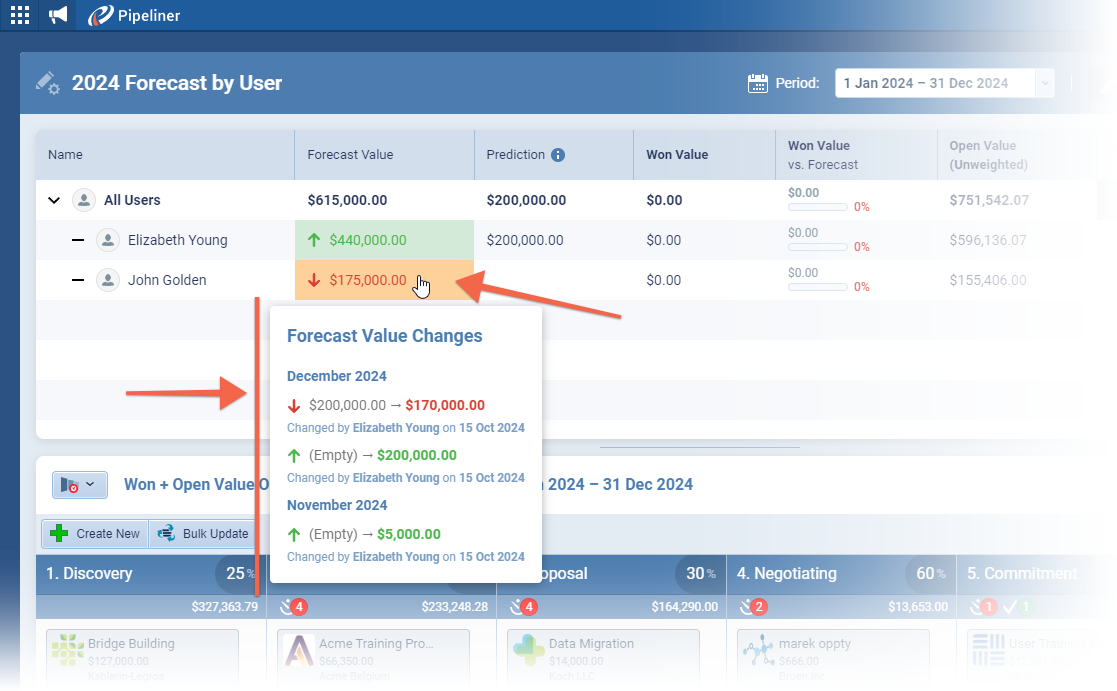
Users can see all changes made to the forecast values: who, when, what was the former value and the new value.
When selecting a specific period, for example a month or a quarterQuarter Quarter is a three-month period in a company’s fiscal year commonly used to make comparative performance analyses, detect or forecast business trends, report earnings, and pay shareholder dividends., the user will see an indicator showing an increase or decrease in the forecast value and and clicking on the Forecast will display a tooltip with all changes for the selected period (eg. December). ⤵
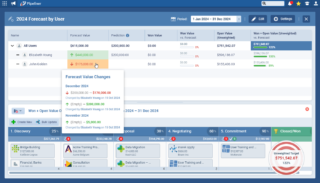
When viewing the whole Forecast period, clicking on the Forecast field will show all changes for each individual period within the Forecast. Periods without any changes are not shown and sorting is from “Latest” › “Oldest“. ⤵
Fullsize Screenshots ⤵
Triggering Processes From Email Sequences
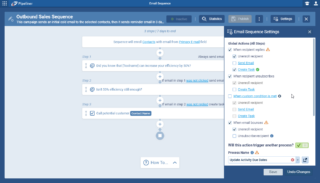
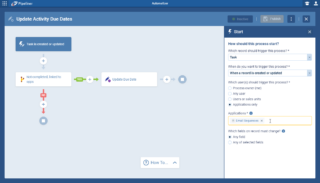
As part of the “Settings” for “Email Sequences“, tasks can be created when the recipient performs certain actions such as replying or unsubscribing. These tasks can now trigger an Automatizer process to directly connect “Email Sequences” with processes to cover scenarios such as
- Running additional workflows for the created task within the email sequence.
- Creating leads when the task was created by the email sequence.
- Enrolling the recipient on another sequence when a task is created after a recipient replies to the email.
- Sending customized emails within the process when a task is created.
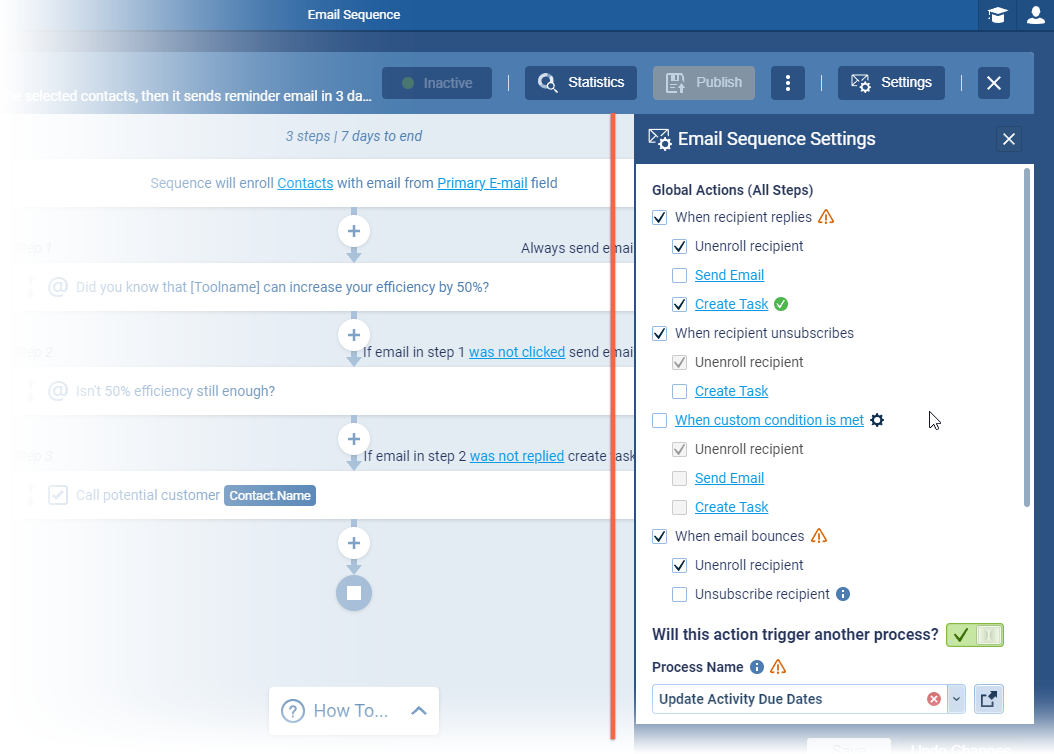
Users will need to toggle on the option “Will this action trigger another process?” and can then choose a compatible process (and open it in a new tab, if needed). Compatible processes are those where:
- The triggering entity is “Task“.
- The trigger type needs to be “When record is created” or “When record is created or updated”.
- “Email Sequences” must be selected in allowed applications.
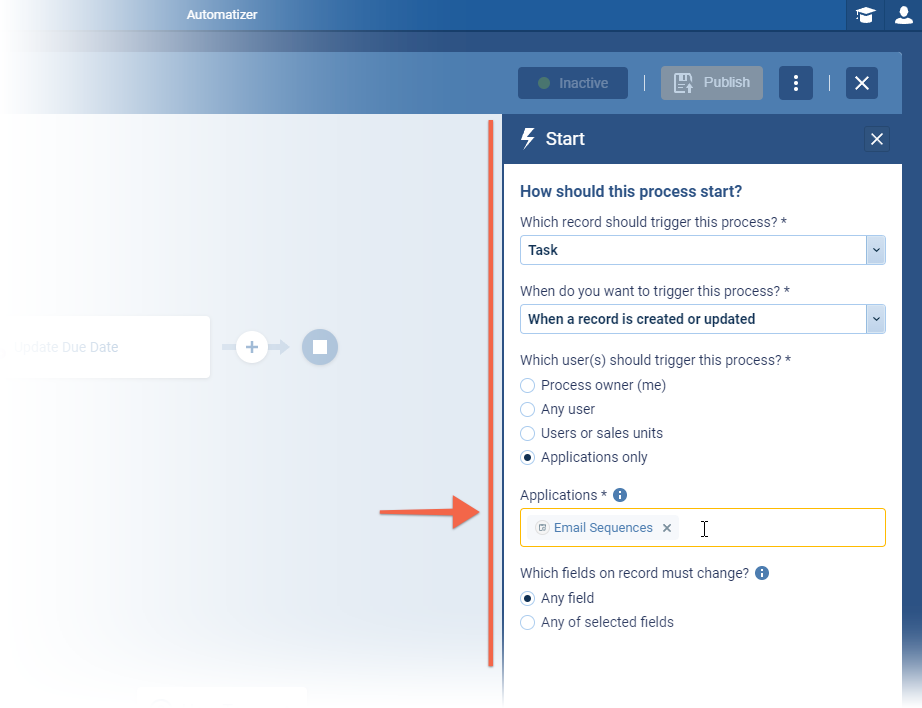
When enabled, each newly created task within the email sequence will trigger the selected process.
Fullsize Screenshots ⤵
Various Improvements
As part of our ongoing usability enhancement program, we’ve updated the following features.
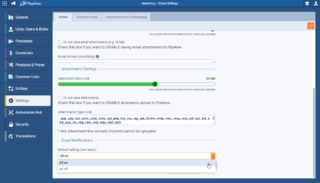
Administration › Disable/Enable Email Notifications in Space
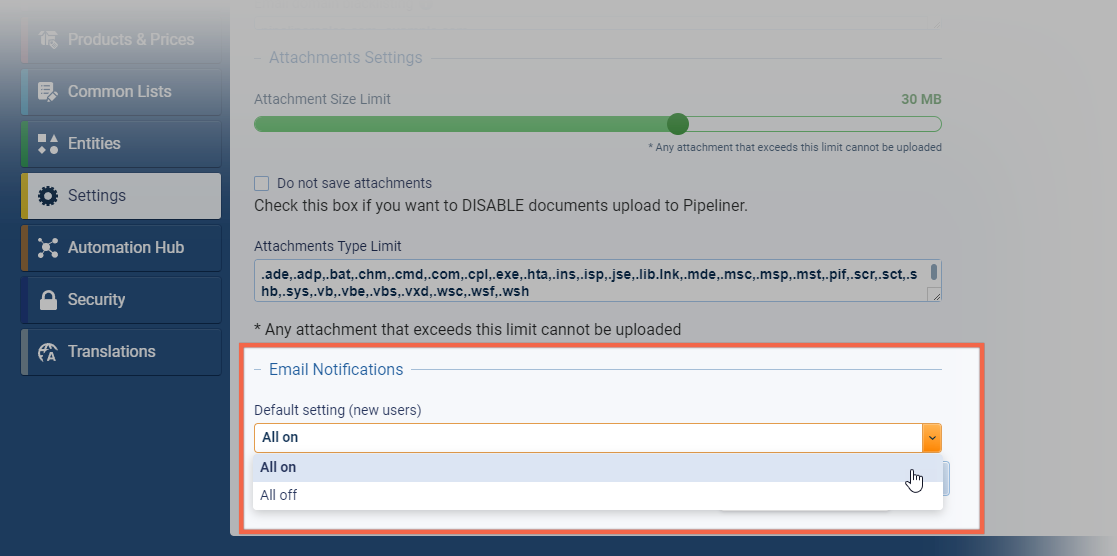
A new option has been added to allow Admins to temporarily, or permanently, disable (or enable) all email notifications within their space for new users. The setting can also be applied to existing users by selecting the preferred option and then clicking on the “Apply to all users” button. This option is very useful if you’re importing dataData Data is a set of quantitative and qualitative facts that can be used as reference or inputs for computations, analyses, descriptions, predictions, reasoning and planning. and don’t want all your users to receive many notifications prompted by the new records or when running processes that make ownership changes. ⤵
Record Update Allowed for Inactive Users
We’ve removed the restriction where a record could not be updated if it was currently owned by an Inactive user.
Filtering Reports
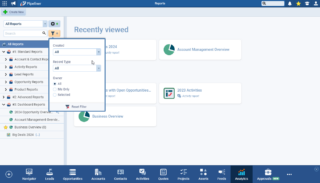
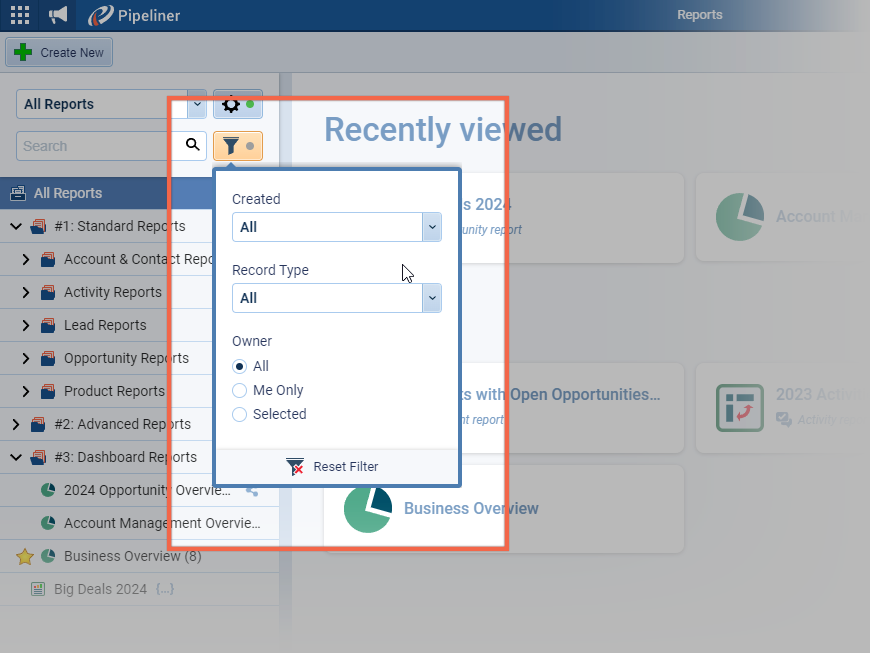
We’ve introduced a new filter box to make finding specific reports quicker and easier. The options include:
- a “Period” dropdown to filter reports by their creation date, using the same period options as in activity feeds.
- a “Record Type” dropdown to filter by all available record types
- Users can now filter records by owner:
- “All” (Default)
- “Me Only“
- “Selected Owner“
“Recently Viewed” & “Favorites” are retained regardless of the selection. ⤵
Dashboard Filtering Update
Dashboards will only be displayed if they contain at least one report that matches the filtered criteria.

